testing the keyboard 
The Apple II Keyboard Saga


Possible Ground Problems

Update 12/5/2008 -   The grounding issue I had with my PS/2 keyboard interface has been proven to NOT be related to the bad MM5740 chips I have.

Update 8/29/2008
-   I'm currently investigating a possible ground problem that may be endemic to Apple II's keyboard interface.  The symptom is the last typed character repeating itself, sometimes endlessly.  I discovered this while working on my prototype PS/2 to Apple II keyboard interface.  I'm not sure if this was specific to my interface or could affect Apple keyboards, as well.  I know I have had similar problems with MM5740 rev B keyboard controllers in the past when used as replacement parts in Apple II keyboards.  I haven't had time to conclusively rule this as the cause or not of problems with those rev B keyboard controllers.   If you are having trouble with repeating characters, with what you think is a good keyboard, try jumpering an extra ground wire between the keyboard's PCB ground plane and the Apple II motherboard's ground plane.

Update 10/29/2008 -   Though the ground problem with the PS/2 to Apple II keyboard interface was real, grounding is not my problem with the MM5740 rev B controllers.  Those controllers simply have some kind of heat related issue.

Keyboard Problems

One of the most common problems of  old Apple II's is problems with the keyboard.  Symptoms include, keys that will not work at all,  keys that repeat, and keystrokes that result in wrong character being displayed.  I have found that sometimes keys will return to proper operation just through typing on the key.  Others may be restored through very light applications of  contact cleaner or 99% rubbing alcohol (remove the keycap, first).  Here are the steps I take to attempt get a key to come back to life.

    First - I just exercise them up and down a number of times.
    Second - I remove the keycab.  I work the key up and down and side to side as I'm moving it up and down.  This
sometimes breaks loose the dirt that is preventing a good contact.
    Third - Then I use an eyedropper to place a drop of isopropyl alcohol in
each side of the mechanism.  Then work the mechanism as in step two.  Let the alcohol evaporate
and repeat a few times, if it doesn't work the first time.
    Fourth - and usually this doesn't work - is repeating the third step with tuner cleaner in instead of alcohol.
    Fifth - replace the key.

Do to hard daily use by me and later in a business, followed by several decades of storage, my old keyboard had a lot of issues and was unusable.  I had so many issues that I ended up creating a keymap that shows how the keyboard was decoded.  This helped quite a bit when it came to debugging problems as sometimes a single stuck key could cause an bunch of connected keys to appear to also have issues.  The green ones, are ones that I have replaced.

key map

Malfunctioning Keys

Here is a partial list of keys that didn't work correctly.
  1. The  T, Y,U,6,I,A and + keys would repeat the character several times, when pressed only once.
  2. F,<-,V, REPEAT, 9,W and : keys were bad and wouldn't respond to pressing.
  3. <-, left shift, period, 8, ESC and Q were flaky (sometimes worked/sometimes didn't).
  4. The Z switch, which had failed, was replaced by a simple push button switch from radio shack!
Year ago, I can remember getting a replacement key from an Apple dealer. I still have the receipt for this purchase.   I tried this again, a few years later, but they no longer stocked the correct key.  I guess these keys were prone to failure.  At this point, the only choice is to find an old Apple II plus, which uses the same keys and do a transplant, and that is what I have done.
example key
This is a close up of a key after being pulled.  Pulling these keys take reasonably good PCB rework skills.  You must be careful to not heat up the leads too much or they will melt and pull out of the plastic case destroying the key.  While the key is still screwed on, I use a soldering iron and a solder sucker to get the solder out,.  Just get the solder hot enough to flow and then quickly use a solder sucker to get the solder out of the hole.  Only release the screw holding the key to the keyboard, when the leads are loose enough that they move in the hole.  Putting any stress on the leads will cause them to pull out of the plastic.  

tools
A quality soldering iron and solder sucker are essential tools for swapping out the keys.
donor and old keyboard
Donor (top) and old (bottom) keyboard during transplant surgery.  The original keyboard had a lot of bad keys.  I ended replacing something like 17 of them!  Before surgery, the Z key was a push button obtained from Radio Shack with a Z painted on top (it is already pulled in this picture).

Old, Poorly Done Repair

As I mentioned, I replaced some keys many years ago.  However I did a poor job on one, which caused some PCB damage.  Basically I had lifted the traces off the PCB where this key was installed.  I ended  up jumpering wires directly to the key in order to repair the damage.  This is what it looked like for the past decade or more.
bad key replacement
I think it may be possible to lay some new traces down here, but for now, I just cleaned up the area and put some nicer looking wires in place.  Note that during testing, I found that the small wire wrap wires that I originally tried to use were not sufficient for the job and the keyboard would not work reliably.   I had to resort to heavier gage jumper wires in order to get reliable operation.  
after clean up

I'm guessing that you are thinking that I should just get another keyboard, but  the point with this project, is a restoration of my old Apple II, not to find a replacement.  Besides original Apple II's can be  pretty expensive.  In any case, I would need an early one, prior to the stiffer reset key or connection to the control character, which Apple eventually introduced.  This keyboard is one of the defining features of an early Apple II.
keyboard repair   top of board

Keyboard Repair, Part II

After thinking about it a couple of years, I finally bit the bullet and went ahead and redid the keyboard PCB repair by etching new traces and installing them.  Two new traces were installed on each side of the circuit board.  Though the result is not perfect, it is vastly better than the previous repairs with the jumper wires.  The traces were eched out of copper foil using a laser toner/PCB type etching technique.  I made a pattern by tracing onto paper and then scanning into an illustration program for fine tuning.  The etched traces are shown below, prior to installation (I made three copies of each trace, but only one was actually needed).
etched traces


Reset Changes

By now, you would have expected that the keyboard would have been back to where I wanted it, but this was not the case. The original Apple II's reset key,  reset the computer, with no other interlock.  It was located right next to the return key, which really made things bad.   Miss the return key and you might just reset your computer!   One of my few vivid memories from those days, is doing just that at the wrong time.  I made a change early on in this computers life, in order to make it harder to actually reset the computer.   I added a toggle switch that you could use to disable the reset function.  In retrospect, I should have added a momentary DPST switch, since I still often left the toggle switch in the wrong state.  Here are the wires that I added to the key board for that function.  In order to put the computer back to a state closer to the original state, I removed these wires.

reset wiring
I also had cut a trace as part of this rework.  Here is shown the small jumper wire I have used to undo the cut.  Now my keyboard will reset whenever I miss the return key and hit reset, just like it was in the early days!
jumper over cut
Note the corrosion on the hardware.  I've been thinking of sanding it off, but think that will change the character of the finish in adjoining areas, so I will leave it be, at least for now.  
 
I'm using the keys caps from a fresher Apple II plus, which seem a bit brighter than the original key caps I have.  I 'm thinking the originals were stained by being used a smoker for a couple of years.  In addition, I melted a corner of the E, with a soldering iron, while doing some ill fated rework on the original PCB, years ago.  I have saved and can always switch back to the original caps, if I find a good reason.  The keyboard is now operating nicely.  Here is a picture of it while I was testing the results of my work.
position of bad cap

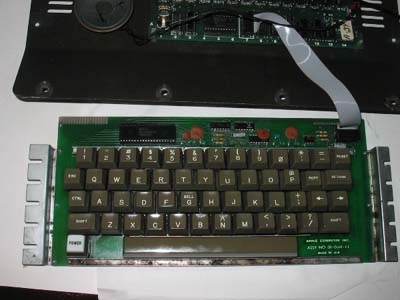
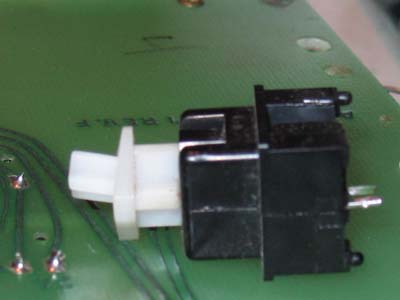
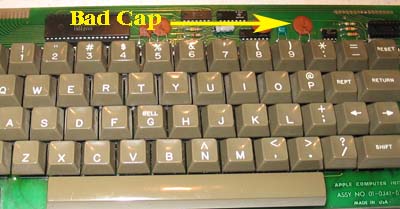
12/1/2005 Another Keyboard Problem

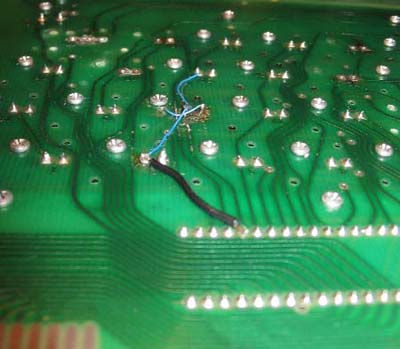
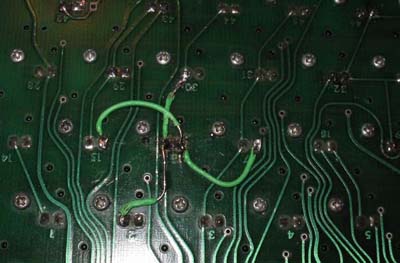
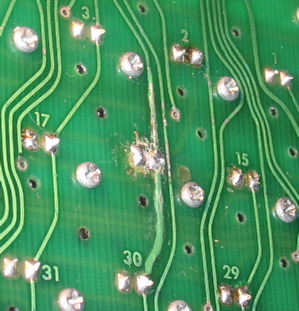
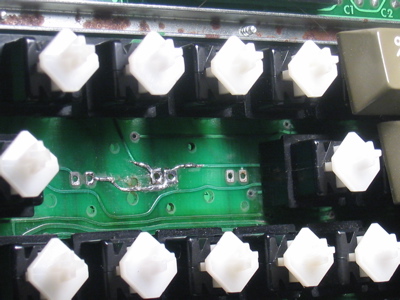
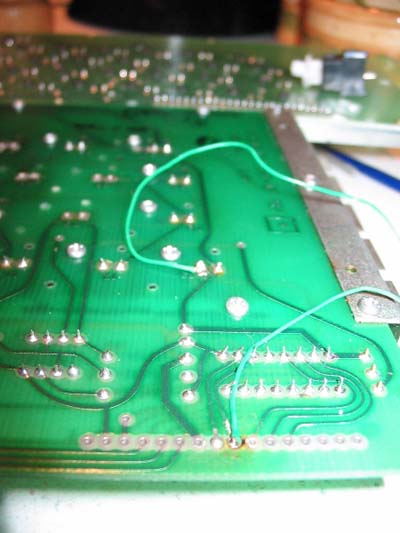
While using the machine recently, I discovered that the repeat key had stopped working.  I investigated the circuit and discovered how the repeat function worked and the cause of the failure.  The repeat function is controlled by a simple 555 timer circuit.  The timer circuit itself is usually held in reset.  However when the repeat key is pressed the reset control is removed and the timer starts strobing the rest of the keyboard circuit.   Further investigation revealed that the capacitor that helps control the speed of the repeat had failed.  Repair involved replacing the capacitor with an equivalent value part.
return keys
back of return key

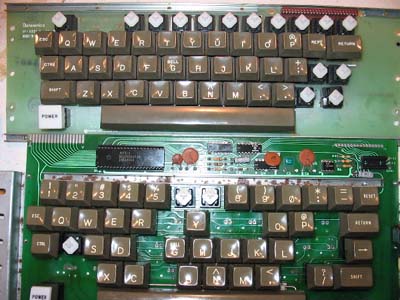
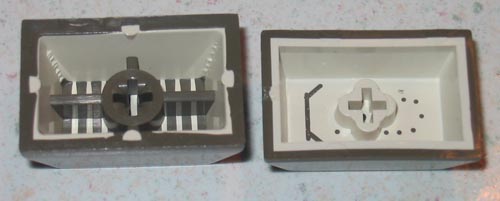
5/27/2007 Keyboard Update

After purchasing a  very early Apple II plus,  I discovered some new information about the early Apple II keyboards.  The font on the esc, rept and reset keycaps changed slightly, getting slightly larger at some point during production.  Also the color of the characters on the keycaps seems to have slowly grow lighter.  All three sets or keycaps that I have, have differents shades or ivory or white for the characters.  The oldest being darkest.  I no longer think that this is just grim or coffee stains.   I've decided to replace the keycaps on my machine with the originals even though the "E" is slightly damaged.  The key on the left is my original return key.  The key on the right is from a fairly early II plus.  Also note that the original is slightly taller and the consturction is different.


Back to Mike's Hobby Home Page