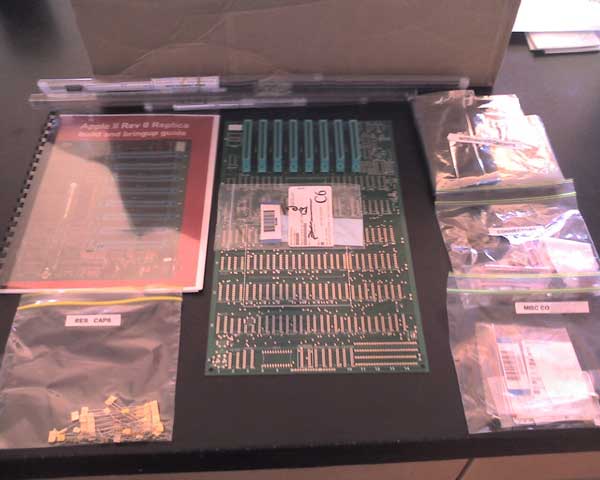
Dave's
kit, after
unpacking
10/11/2007Mike-
It arrived today. I must say, it's a beautiful PCB. Very professional looking. I think the hardest part will be putting the decals on. I was never very good at that. Would it be better to do the decals first or last?
Hi Dave,
Glad everything arrived in good order. I put the decals on last, on my prototype, as I was worried that the heat of soldering might melt them. The key to decals is to apply the setting solution very lightly with a small brush, just so it settles down onto the surface it is being applied to. It must be properly positioned before applying the decal setting solution, as the solution will melt it onto the surface. Apply too much, and the decal will melt too much and lose it's shape. Don't touch the decal once the setting solution is applied, until it is dry.
10/17/2007
Hi Mike-
I've bought all my supplies, and soldered all the sockets and bypass caps on. So far, so good. Enough of everything. One thing you might mention in the guide concerns the decal setting solution. I didn't know it came in the same bottle as the Testors model paint. In my search, I looked right passed it even though it was in the same display as the paint at the hobby store. The people who worked at the store didn't know what it was, either. You might want to mention some details as what to look for in the guide for us decal clueless.
That was the only minor hiccup in a completely flawless project. I'm now trying to figure out how to display it so the motherboard is visible. I need a transparent case lid :-)
Hi Dave,
Thanks for the tip on the decal solvent, sounds like you are making rapid progress. I'll bet you could could fabricate a clear cover from an acrylic sheet. Now that you mentioned it, I kind of like the idea, and may investigate further.
10/18/2007
Mike-
Got everything done. Stuffing those sockets was a bear. Any better sockets available? These have an annoying lip around each hole that requires exact positions for every pin.
So the problem is I have no clock. On close inspection of your board, I notice my 2n3906's are oriented differently than yours. I followed the silkscreen orientation. Should I rotate them around to match yours?
Dave,
For the 2n3906's used for clock generation, use the orientation that I used (cover of the manual). The silkscreen on the original rev0 is wrong, and that is what I duplicated on my replica silkscreen. Sorry about that, I made the same mistake and should have remembered to mention that in the bringup guide.
I do strongly feel that these sockets are a significant upgrade over the type Apple used. Note that they cost about 3 to 4 times as much as the kind that Apple used and that the contact area is gold plated. Back in the late 70s and 80's I worked for a mini-computer company and we used similar milled sockets on that high-end equipment and I can't recall hearing about any problems with sockets, back then. If you listen closely to the Apple at 30 audio recordings at www.digibarn.com, the Apple folks mention that even back then, that they had trouble with the sockets that they used.
Though I didn't have any particular difficulty with the sockets, I do see what you mean by the ridge on the sockets, by comparing with some others that I have on hand. I guess my next lot of sockets will cost me even more than that first lot. Darn things cost nearly as much as the IC's that we stick in them! (note: current kits have a different brand of machined sockets without the troublesome lip)
Mike-
indeed, it was the orientation of the 2n3906's. I matched yours, and I had video. Quick press of reset and at the Applesoft prompt. Now for the hard part - decals.
One last question I have is the character generator ROM. Do the characters match the Rev 0? I noticed some discrepancy between my other Apples. Not really an issue, just curious. Can I use the character ROM from a later rev ?
Thanks again for a great project. I'm sure there will be a few more interested when they hear about our results.
Dave,
You may want to swap the character rom with one from a slightly later rev board, though I only noticed two differences - the up arrow and the colon character. The markings will read R0-3-2513, CGR-001. Unfortunately, the ones that I bought, were not fully described by the seller. Other surplus suppliers have rather high minimum purchase requirements, that would have totally blown my budget. I still may get a lot of the correct character ROM at a later time, should this project generate enough interest. (note: current kits come with correct character generator)
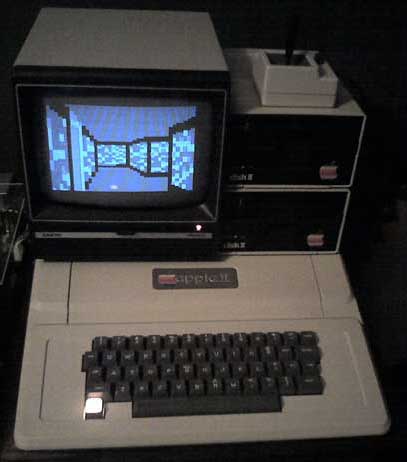
Dave's motherboard in a case and up and running his program "Escape from the home brew computer club"
Back to Mike's Hobby Home Page