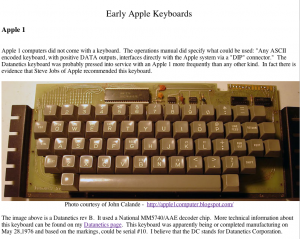
Just added the first version of an early Apple keyboard page. This details some of the changes that went into early Datanetics and Apple keyboards. There are more keyboards to be added, but I figured that I had enough interesting stuff written up to put up this link.
Category Archives: Datanetics PCB
Datanetics Keyboard Replica Progress
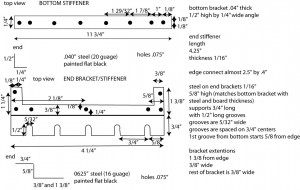
Still working on this one in my spare time. Just completed drawings (not to scale) for the brackets.
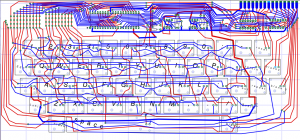
Layout is coming along also. I have smoothed out the traces on the top and am working on the bottom. Also spent a lot of time working on hole sizes. It is surprising how important this is to a good replica and how long it takes to measure the various holes in a PCB.
Datanetics Web Page Started
Mostly just have schematics which I spent the last week drawing and a few notes on key switches and the encoder part.
Datanetics Keyboard Update
I’ve got all connections made, except for the connections from the blank keys to the matrix on the upper left side of the keyboard. From here I may take a break and make a schematic, since I’m not aware of any in existence for this keyboard.
I still have holes to drill 🙂 and plenty of fine tuning to do. This layout will match a Rev B board. There is a mistake in the original layout of this board which requires a couple of of cuts and and a jumper. I will probably leave the mistake in place.
The pinout of the edge connector is:
Front (from inside of board moving toward edge when facing front of board, left to right)
-12V
B6 (B is data bit)
B5
B4
B1
B2
B3
Reset key pin 1
Reset key pin 2
Output enable (this is an input to the keyboard, but is pulled up on the board to +5 volts)
STROBE (output)
B7
B8
B9
GROUND
back side of keyboard (from edge of board moving inward when facing back of board) (Right to left)
blank keyswitch 2-2
blank keyswitch 2-1
blank keyswitch 1-2
blank keyswitch 1-1
blank keyswitch 3-2
blank keyswitch 3-1
blank keyswitch 4-2
blank keyswitch 4-1
unused
unused
unused
+5 Volts
unused
unused
unused
Now it’s time to go for a bike ride.


