Scopewriter Stability Changes

Those of you who visited my SCELBI/Scopewriter exhibit at VCF east may have noticed that I was dealing with some stability problems with the Scopewriter display. I finally found some time to resolve the issue.

The Scopewriter uses a TMS3112 Static Shift Register to hold the output. The design uses a clock to circulate the text through the shift register in order to refresh the display. This is somewhat similar to the Apple 1 or TV Typewriter design. It turns out that the clock feeding from IC1, pin 10, to the TMS3112, pin 7, doesn’t meet the pulse width, clock low specification of 150ns. A quick fix that seems to work is to add a .1uF capacitor in parallel to C2, which couples these two pins.

There is another change that I made a while back in order to get the Scopewriter to work. That is adding a 470 ohm resistor in parallel to the 100K resistor, R4. I can’t remember exactly why that change was necessary, but last week, as an experiment, I removed the hacked on resistor and I couldn’t get a good display on the scope. That may be documented in one of my earlier Scopewriter posts, but I don’t have the time to figure it out. I ended up putting the resister back in place.

At this point, Scopewriter seems to be working very well with the SCELBI.

How Not to Connect a Ground Plane

In the following image of the Digital Group Video Card, the ground traces are highlighted in green.

Digital Group Video Board Grounding (in green)
Digital Group Video Board (ground traces in green)


I normally I try to refrain for making severe criticisms of the boards I work to reproduce. The people who designed these products were blazing new trails, something that should be respected. However, the routing of ground traces on this board appears to be something that should avoided by people producing new designs. Note how the route to ground for the 74123 (in the bottom center) runs completely around the exterior of the board before exiting on the board edge connector, which it is almost touching. When I finally build one up, I wouldn’t be surprised if I have ground issues with this design. The good news is that it should be pretty easy to resolve any issues that do crop up.

I have quite a bit of fine tuning and clean up to do before ordering a PCB, but as you can see by viewing the layout image in this post, the hardest part of the work is done. The existing schematics don’t have any kind of chip ID or location, other than part type. I’ll be rectifying this and be publishing a parts list, chip placement diagram and updated schematics, by the time I’m done with this project.

I discovered one other issue that I’ll have to deal with. The 6571 character generator needs a +12 volt supply. For now, I can use a separate 12 volt lab supply. I think I’ll have to create some kind boost converter to generate +12 from the +5 volt supply by the time I’m done with this project.

The Advantage of Running Traces Between Pads

I’ve been working on reproducing the a copy of the Digital Group video card. In the process, I have found that the layout of the board is pretty convoluted in some places. In particular, the layout for the seven 1101 memory chips is pretty messy. Though, it is far from complete, the traces are all in place and you can see approximately what this part of the completed design will look like by viewing the following image.

Digital Group Video Card 1100 SRAM Layout

Take a look at how the traces wind around the outside of the chips. Circuit board design was done by hand back in those days. The layout is made by making an image of the PCB on a piece of film that will be reproduced by photographic imaging. Each small section of straight trace is laid onto a piece of film by cutting an appropriate length of tape and laying it down on the film. Though the size is typically 2X the final size of the PCB, which makes things a little easier, it is still a time consuming process. With this many changes in direction for each trace, I can’t imagine how long it took the layout artist to produce the original artwork. Even digitally, it is taking quite a while for me to reproduce.

For quite a different approach to the same problem, take a look at the layout of 1 bank of the SCELBI 1K SRAM card, which uses the same 1101 memory chips. In this case almost all traces run in straight lines, making for a much easier layout process.

SCELBI 1101 SRAM Bank Layout

So why is there so much a difference? The Digital Group card has absolutely no traces running between the pads of a chip. I presume they did this in order to make the design a little more robust as tolerances can be a bit tight when you run traces between the small gaps between the legs of a chip. Tight tolerances can result in higher likelihood of PCB manufacturing defects or solder shorts during the assembly process. However, by making the small sacrifice of tighter tolerances, you can see that there is great improvement in the resulting design.

New 8008 Software released!

I’ve released a new version of my OS/X SCELBI app.

Scelbi App with Scopewriter Interface

This version incorporates support for the SCELBI Scopewriter interface. This support is pretty barebones, and doesn’t include emulated hardware timing. While any real SCELBI Scopewriter application will work in this emulator, because timing is not emulated, applications developed in the emulator may not work on the real thing.

The second feature added, is integrated support for a 256 byte EPROM in the 4K/8H mode. There are two versions of the EPROM included. First EPROM image is a MCMON monitor with a 2400 baud bit banged serial driver. The second EPROM image is different version of the MCMON monitor that includes support for keyboard and the Scopewriter.

The best news is that this version freely available and downloadable from my website.

The Scopewriter version of MCMON is now downloadable from my MCMON page.

But that’s not all, in order to demo the Scopewriter with the SCELBI, I have SCELBI’s hangman game going on both versions of MCMON. It is also downloadable from my 8008 applications page.

URG!!! – The Difficulties of Porting 8008 Programs

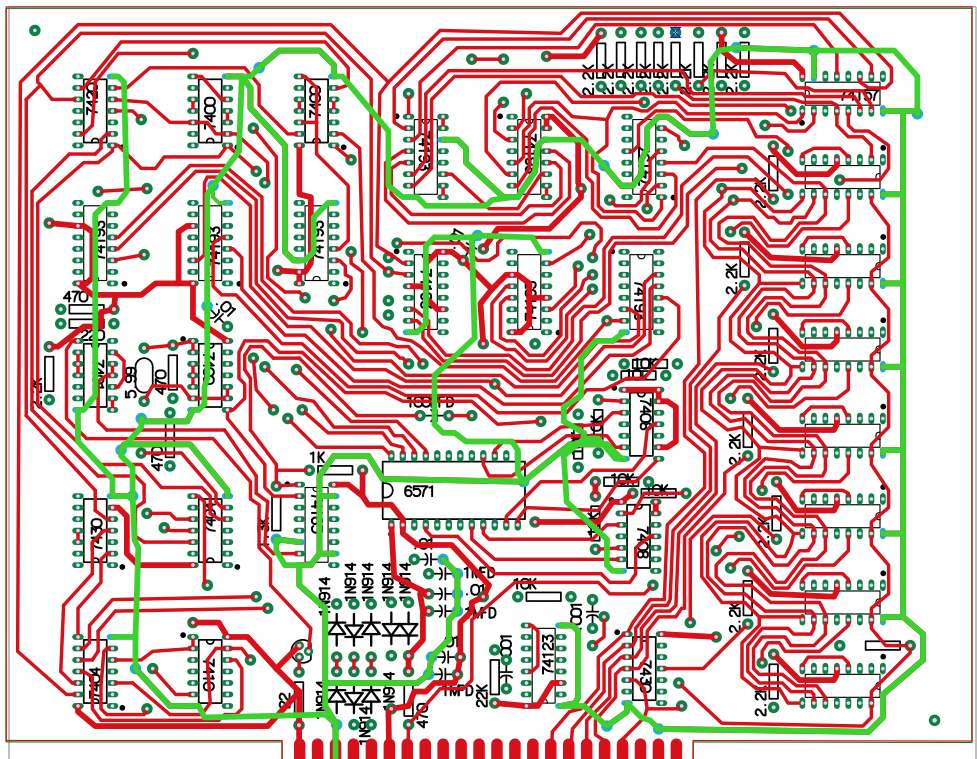
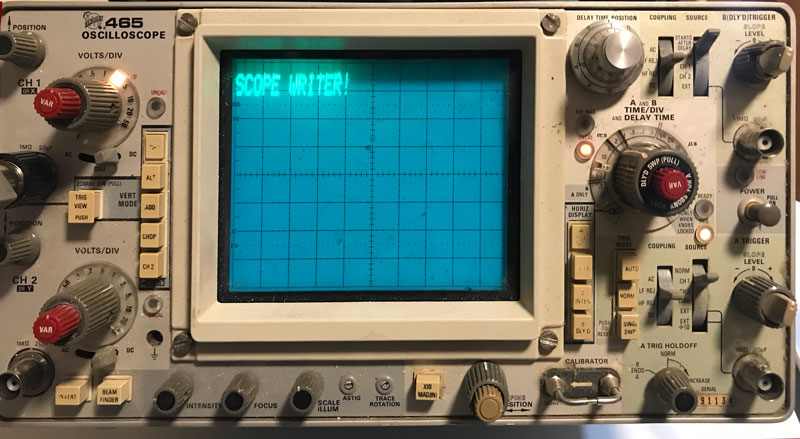
Most 8008 based computers are very similar, the CPU, some static memory, maybe some EPROM with a monitor and I/O ports.

The 8 bit I/O instructions of the 8008 lead to very simple hardware interfaces. Typical interfaces include serial “bit banged” ports, where is single output and a single input bit is tied to a simple current loop or RS232 level interface. The other basic type is a parallel byte oriented interface, where bytes are sent to the output ports and latched by external (outside the CPU complex) hardware for use. An example of the latter type would be a UART, which converts a byte of data handed to it, into a serial stream of bits.

Like many programs of the time, most 8008 applications were written for a specific hardware platform and included drivers for that platform. Example platforms include the Mark-8, SCELBI, Mike, RGS, Microl, and so on.

The driver is the piece of code responsible for moving data between the CPU and whatever peripheral devices are used by that program. Any program of the period will initially be written with drivers appropriate for the platform that that programs original author is using.

Moving programs between these platforms with different I/O interfaces, involves replacing or rewriting the drivers, so the ported program will interface correctly with the hardware on the target platform.

What sometimes makes porting 8008 programs so difficult, is that often, different drivers make different use of the limited register set of the 8008. Programs written for a specific driver will be written to take account of the registers used by the driver. This is so that when the driver is called, the driver does not corrupt any registers that are in use by the main program.

So here’s the problem. Let us say that we are porting a program to a system that requires usage of an extra register in the user input handler program. The person porting the code has to go back to every place in the program that calls the user input driver and make sure that the extra register is available for that driver. Not only that, but any place that calls the routine that calls the driver, also has to take into account how those registers may be affected. With the 8008, this affect tends to cascade though the subroutine call stack, making reservation of a single register more complicated than expected.

For most processors, this isn’t a great big deal. If necessary, the programmer simply saves the register to memory, before calling the driver. However, with the 8008, saving the register requires that you set up H and L registers with the address in memory in which to save the register. If H and L are being used already, this means that not only do you have to save the first register, you first have to save H and L. Saving H and L requires 2 additional registers. To save the original H and L, you need to move them to different registers so that you can put the address of where the original H and L are to be saved into H and L. Then after the driver is called, you may have to restore all the registers back to the original settings.

If you are seriously constrained in total amount of memory, things get worse. An example of a memory constrained program is MCMON, which runs in a single 256 byte EPROM, plus a little bit of SRAM for variable storage. In the MCMON case, adding a bunch of code to save and restore registers everyplace a driver might get called, could could easily end up causing the program size to expand beyond the 256 bytes of available memory. It took considerable amount of work to make MCMON fit in the available space.

On the surface, porting 8008 programs would seem straight forward. In actual practice, I find it far from straight forward, and often a difficult process. I still recall porting the Starshooter game that was documented in an early Byte Magazine article. This game was written for the SCELBI and I was porting to a SCELBI, which would seem simple. However, the original author’s SCELBI must have had an UART, which simplified his drivers. A UART handles all the serialization in the UART chip. My SCELBI only had a bit banged serial interface, which required a more complex driver, which used additional registers. I managed to port the program, but it took me a number of hours to work through all the changes needed to make the game work on my system.

SCELBI MCMON Modified for Keyboard and Scopewriter

Down below is a link to a modified MCMON that supports SCELBI keyboard input and Scopewriter output. This monitor rewrite took a lot longer to get working than I expected. I had all kinds of issues figuring out a register and memory allocation scheme that wouldn’t bloat the code to beyond 256 bytes. In the end, I managed to squeeze it down enough so that I actually have 5 free bytes for additional features or bug fixes.

I verified this monitor is functional by first running it out of SRAM, and finally, when I thought everything was working well, I burned a 1702 EPROM. I installed the EPROM on the modified SCELBI 1K SRAM memory board which has provisions for a single 1702 EPROM. In the past, I had the serial interface version of MCMON in that spot.

It turns out that the Scopewriter output is much easier to read than the SCELBI CRT interface. This clarity comes at cost, as it only has one line of output compared the the SCELBI CRT’s five. However, it’s pretty clear to me, that because of the vastly more complex design, that the SCELBI CRT interface couldn’t compete, once the Scopewriter came out.

I had to delete the serial bootstrap function when I ported the MCMON to the keyboard/scopewriter combination. Anyway, a keyboard bootstrap wouldn’t work that well anyway. You might as well use the built in monitor commands to load memory. Manually entering a bootstrap isn’t going to be the end of the world. I did a test by entering in the complete MCMON into one page while running it out of another page. MCMON is amazingly efficient in terms of keystrokes when it comes to reading and writing memory. I was able to successfully type in a working copy of the monitor in just a few minutes. Entering a boot loader shouldn’t be much of an issue.

One thing about these vintage computer projects, is that one project always leads to more. I now need to upgrade my OS/X SCELBI emulator to support the Scopewriter.

I’ll also need to come up some kind of demo application, that will run with only one line of output visible at a time and can run in less than 4K of memory. This will preferably be some kind of game or other entertainment mechanism. Maybe someone knows of a small version of Colossal Cave or a similar app floating around.

Oh yeah, then there is the need to put this interface in a nice project box…

Scopewriter Working With SCELBI

SCELBI ScopeWriter Setup

I had a few issues getting this set up working, but it had more to do with the fact that I hadn’t powered up my SCELBI 8H in a long time and I had forgotten how to set it up with MCMON and the serial port adapter. Once I had that all figured out, I just had to move the Scopewriter output ports from 4-7 to 0-3 and tweak the driver to reflect the changed port assignments. After that, the Scopewriter interface worked without any further problems. Well, to be honest, I did initially put a couple of the 74XX chips into the wrong sockets, but that was easily diagnosed and rectified.

SCELBI Scopewriter Output

The SCELBI-Scopewriter project has one more step. I’m going to create a modified version of MCMON that uses the Scopewriter for output and the SCELBI keyboard interface for input. This is a combination of historically available add ons. They will transform the SCELBI 8H from a very difficult to use computer to a machine that is fairly practical. If you added a cassette interface, the system ends up with pretty decent capabilities for the day. It’s true that the cassette driver would have to entered via the monitor program, but that shouldn’t take but a minute or two.

The neat thing about this, is that all this technology existed in one form or another, back in the mid 1970s. It’s true that I basically rewrote the Creed monitor for the SCELBI, but the rewrite was certainly something that was doable back in the day.

A little more about the SCELBI Scopewriter Interface

This interface is pretty simple. It uses the strobes and data bit 0 from three output ports to control the Scopewriter switches S1 through S3. It uses another strobe to load the character from the data bus into a 6 bit latch.

Scelbi Interface Schematic

I thought about how best to implement this design. I even went through the effort to create a PCB design.

SCELBI Interface PCB

In the process of creating this PCB layout, I think I found one mistake in the schematics. OS7 should be connected to pin 13 on Z5 instead of pin 4. I’ll verify this when I power up and check it out.

When I remembered that I had a perf board with a 44 pin edge connector, I decided to build the Scopewriter interface with that. I could have etched the PCB that I laid out. This design requires a two sided PCB and etching those at home is quite a fiddly process. This perf board probably would have been slightly quicker to wire using wirewrap techniques, but I didn’t have a sufficient quantity of wirewrap sockets. I was able to complete the wiring on the perf board in about a half a day. That is about the same amount of time that it would take to cut, etch and drill a custom PCB. The result is shown below.

SCELBI scopewriter interface

The interface uses 22 signal lines, which doesn’t leave room for power and ground on the same side of the edge connector. I decided to add +5 volts and ground to pins 1 and 3, on the top side. Those are the red wires in the photo.

Since I’m short on Amphenol sockets, I decided to connect three of the four strobes from the SCELBI chassis, without a full connector. I cut down and filed a finish nail so that it would fit snuggly into an Amphenol socket. Then I soldered it to the end of each wire.

SCELBI Strobe Connectors

It occurred to me that this interface could probably be redesigned to use two output ports instead of four. This can be done by latching data bits 1 and 2 with OS4, instead of using separate strobes to control S1 and S2. I decided to stay with the original design, so I could use the original software.

The build decisions were partly driven by what I had in my spare parts stash, which once again proved diverse enough to support this project without requiring any new purchases. That is a good thing.

SCELBI Scopewriter Interface

SCELBI Scopewriter Interface

This interface design is taken directly from the SCELBI Computer Digest, volume I, issue I. With the exception of the enclosure, it turns out that I had all the parts needed in my stash to build it. The dimension of the block of wood that I’m mounting this on, are set up such that it will be easy to move it into a Bud 3009-A enclosure. This is the enclosure in which most SCELBI peripherals are housed in.

It’s about ready to power up, but I’m wondering how much effort it will take to make it work. Unlike many people doing similar projects, I’m not real anxious to find out. More often that not, I’ve spent many hours trouble-shooting these kinds of designs before they could be made to work. Let’s just say that, at this point, I’m a little gun shy. I’ll most likely power it on tomorrow morning.

Scopewriter Update

I’m preparing to try interfacing my Scopewriter to a SCELBI computer.  One issue I had with the Scopewriter was the character generator.  It was designed to use a TMS2501, which I have been unable to find a source for.  A while back, I adapted a GI 2513 for the purpose, but it was kind of a hack.  A while back, a friend in Europe sent me a substitute, a TESLA MHB 2501, which he says are readily available for low prices over there.

Tesla MHB2501 in scopewriter

Tesla MHB2501 in scopewriter

This substitute works fine. Stay tuned for an future blog article describing how this interfacing project goes.