More on SCELBI

In September, I did a presentation on the history and technology of the SCELBI computer business at VCF-Midwest.  I enjoyed doing the research for that talk, and it inspired me to start writing down what I learned.  This story will be illustrated with many of the images that I have acquired over the years of researching SCELBI.

I’m about 2/3rds of the way through writing the initial draft.  As I put together this document, I am learning a lot more than I expected.  I have answered a few of the questions I had originally raised, in preparing the VCF-MW presentation.  Some other questions have been raised, but I suppose that that is how these things go.

As I started writing this story, I found it was necessary to put the SCELBI business in context with other start up businesses and hobby activities that were going on at the time.  This story is becoming almost as much, the story of the first generation of 8008 based home/hobby computers, as the story of SCELBI, itself.  I plan to have a draft to share in a month or two.

My hope that the vintage computer hobbyist or historian might enjoy this story, once I get it into shape.

Apple II Restoration Redo

When I restored my Apple II back in 2008, one of the things I did was to remove a modification I had made back in the late 1970s.

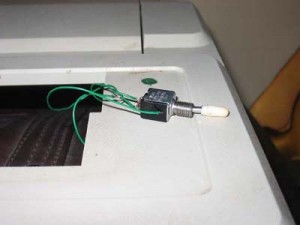
This was a change that I had made in order to work around a very annoying feature of the Apple II. The reset switch was located right next to the return key and was not gated by any other keys or logic. If you were typing on the keyboard and attempted to hit the return key and accidentally hit the reset key by mistake, you would reset your computer. My fix back in the day, was to put a toggle switch in series with the reset key that would disable or enable it. Here is a picture of the switch in 2008 after it was pulled and with the mounting hole filled with modeling putty.

Reset Switch Being Pulled

Reset Switch Being Pulled

Over time, I realized that the reset mod was part of the history of the computer and should have been left in place. I came to this conclusion quite a number of years ago. This morning, I finally went ahead and put the toggle switch back in. This is same exact switch that I pulled out of the machine in 2008.

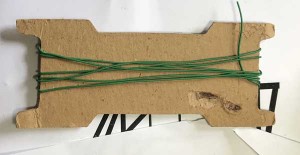
Sometimes being a pack rat, pays off. I was even able to find some of the same green wire that I had used to wire the switch back in the late 1970s.

Old Green Wire

Old Green Wire

The reinstallation wasn’t without difficultly, though. After reassembling the machine, I couldn’t get a reset to “take”, at all. Turns out that the reset key itself had decided it didn’t want to function. I disassembled the machine, and flooded the key with isopropyl alcohol. That did the trick and it came back to life. While I had the machine apart, I also flooded the control key, which has been giving me trouble for a number of years. Since the machine has been sitting for quite a while, a few other keys need some coaxing, but they all came back to life.

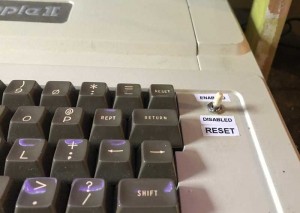
When I originally did the job, I didn’t label the switch, and often forgot which position was which. This time, I decided to label it. In retrospect, I should have used a normally open, momentary switch, which in effect, would have worked the same way as Apple’s control-reset solution. I didn’t think of that back in the day, so I decided to reinstall the same old switch with the addition of those descriptive labels.

Reset Enable Switch

Reset Enable Switch

Superproto PCB Design Files Just Made Available for Free Download

I just added a link to OsmondPCB and gerber files to the Superproto Wiki in case someone wants to build their own PCBs.

http://willegal.net/superproto/index.php?title=Main_Page

SUPERPROTO

SUPERPROTO


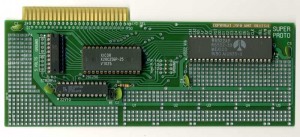
In case you weren’t aware of it, the SuperProto is an Apple II prototyping card designed with EEPROM and the basic Apple II hardware interfacing circuitry “built in”. This makes implementation of some types of Apple ][ interfaces much more straightforward than doing it all from scratch.

Design Your Own Train – Apple ][ application – circa 1987

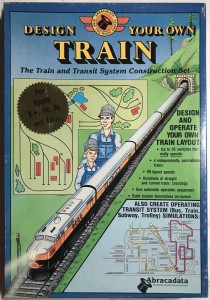
Sometimes I can’t resist things which cross over multiple hobbies that I enjoy, especially when the price is low. I recently picked up a near mint copy of this Apple ][ program on eBay.

Design Your Own Train - box

Design Your Own Train – box

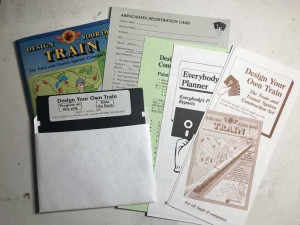
The contents are in immaculate condition and were nicely produced.

Design You Own Train - contents

Design You Own Train – contents

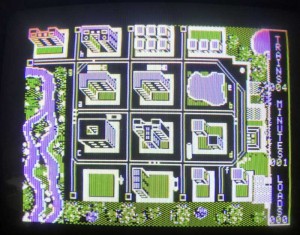
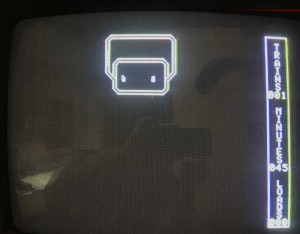
The program is supposed to allow you to design a layout and run trains in what is now known as a virtual environment. Here is the screen that comes up when the program is first started up. It shows a completed layout up and operating.

Design Your Own Train - startscreen

Design Your Own Train – startscreen

I spent a couple of hours figuring out how to design a railroad myself, and run a train in this virtual environment. The result was this simple layout.

Design Your Own Train - custom route

Design Your Own Train – custom route

The learning curve was quick and within a couple of hours, I had a train running – really not a bad experience. Many “modern” programs will be much, much harder to come up to speed on.

However, my impression is that the limitations of the program prevent it from becoming a real design or operations planning tool that the companies marketing claims it to be. Though I might be able to put the City Point module that I am currently working on into the program, it would be only in a stylized way. Back in the day, my opinion is that pencil and paper would have been a better tool. Here are some of the more severe limitations of the program.

  • Tracks direction is limited to the 8 fundamental cardinal and ordinal points.
  • The amount of trackage is limited to what will fit on the screen
  • Only 4 trains can be run
  • There are only left and right 45 degree switches
  • Overall, learning this program was a fun and inexpensive little experiment in nastalgia.

    Datanetics Rev B PCB Design Files Now Available

    As I have decided not to make any more runs of certain PCB’s, I’ve started to make the design files available for other people to use. Keep in mind, if you decide to use them, you are responsible for any and all problems, difficulties and expenses associated with the use of these designs.

    Currently available are:

  • Apple II rev 0:http://www.willegal.net/appleii/A2rev0.zip
  • PS/2 to ASCII keyboard:
    Software Files:
    http://www.willegal.net/appleii/SWfiles.zip
    Hardware files:
    http://www.willegal.net/appleii/HWfiles.zip
  • Datanetics Rev B PCB: http://www.willegal.net/appleii/dc-6e.zip
  • Since I’m sold out of them, when I get a chance, I’ll make the Superproto hardware design files available. The GAL and software is already available on the Superproto Wiki.

    Railroad Yard Control Panel

    Here is a proposed design for one half of the control panel for the first module.

    Railroad Yard Panel

    Railroad Yard Panel


    Since the yard is part of a peninsula, I’m putting half of the switch controls on each side, with indicator lights showing how the switches on other half are configured.

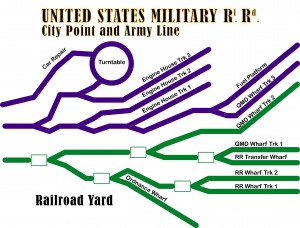
    You can also see why this is first module that I’m building. Virtually the entire City Point terminal complex can be reached directly from tracks off of this module. There were crossover switches just to left of this part of the yard, that connect the two halves together. That will be the next module that I will build.

    After starting construction of the City Point Terminal, a couple of things have impressed me.

    First is the great difference between building a mythical model railroad and building a scale model of a certain time and place. The later brings a lot of interesting little problems and tasks into play, that don’t exist in the mythical model railroad. Choosing an era that is not that well supported by commercial products, just makes it that much more interesting.

    The other is how this process is surprisingly similar to building reproduction vintage computers. Research, planning, design, fabrication and troubleshooting are all involved in a very similar way. In a sense the City Point and Army Line model is a reproduction, in miniature, of the real thing. The difference is my reproduction vintage computers aren’t scaled down, and unlike a model railroad, operate in exactly the same way, as the original.

    Apple II rev 0 reproduction gerber and CAD files available for download

    I have made available Apple II rev 0 reproduction gerber and CAD files freely available for download. I actually put these files online a little while back, but didn’t make any announcement. I’m making this announcement, so that people will be more aware of the increased possibility of reproductions being passed off as original units. I.E. the possibility of fakes is increased.

    Here is the link:http://www.willegal.net/appleii/A2rev0.zip

    I believe that several people may already be making some new Apple II reproductions using these CAD files. If you are interested in having one, your best bet would be to make some queries in the more popular forums.

    PS/2 keyboard adapter calibration notes.

    I put the design files for my PS/2 to parallel ASCII adapter online when I ran out of PCBs. I get an occassional question about programming the AVRs. Mostly it is straight forward, however for the RS232 port to work properly, the internal RC-oscillator must be calibrated. Here are some notes about the calibration procedure.

    Calibrating and programing is a four stage process. The calib and operation FW are built from the same source. Look in the source for a .IFDEF CALIB to see the difference.

    When booting the calib image, it will output a 4Khz square wave out port B.

    The calibration is done by connecting a terminal to the serial port and typing one of the following 4 commands.

    I – this increases the calibration frequency
    D – this decreases the calibration frequency
    W – this neither increases or decreases frequency
    Q – this quits the calibration process, displays the calibration variable, writes it to the last location of EEPROM and exits the calibration process

    You need to connect a frequency counter or scope to one of the “B” port outputs and either increase or decrease the frequency until it is as close as possible to 4Khz. These days, many inexpensive meters have frequency counters that will be accurate enough for this job.

    The AVR will not echo the correct character to the RS232 port, when it is out of calibration. The calibration routine will default to decrementing the calibration value if it receives a character that it doesn’t understand. Just keep typing and eventually it will wrap around into a good range, at which point you can fine tune it.

    So the four steps are:
    1) First load the calib file (AVRPS2_keyboard_calib.hex) and run it to adjust the frequency, as described above. When you have the frequency in a good spot, type Q and the the controller will output the calibration value and also writes it to the last location of the EEprom. For record keeping purposes, it is a good idea to write the calibration value with a marker on the underside of the chip when you are done.
    2) I have an AVR dude script that reads the EEPROM – I would run this to get the calibration value into a hex file.
    3) Now you can program the regular firmware (PS-2keyboardv3.0.hex). Unfortunately, with AVRdude, this process also erases EEPROM, so you need to reprogram the calibration value into the last byte of the EEPROM.
    4) Reprogram the calibration value into EEPROM using the AVRdude script provided, using the EEPROM file you read from the system in step 2 and you are done.

    If you are doing a batch of them, once you get things set up, it takes only about 30 seconds or so to go through the scripts, to calibrate and program, each part.

    In this design, it would have been nice to use a crystal for clock generation to avoid the calibration hassle. However, that would take two pins of the AVR, which I didn’t have available. I could have freed up a couple of pins by configuring the settings with the keyboard or serial port. It would have taken time to write the software that I didn’t have available, as, at that point, I was in the middle of the inital Apple 1 cloning effort for Mimeo.