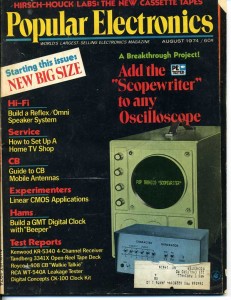
First of all – what is a Scopewriter? It was a circuit intended to make use of an oscilloscope for a single line terminal display. It can take 6 bit ASCII character input and display up to 32 characters on an Oscilloscope. The complete design, with PCB layout, was published in Popular Electronics in 1974.
I got interested in building one, thinking it would make a nice accessory for the Scelbi Mini-computer replica that I am planning on building. It is supposed to support a single line/32 character display. There is some documentation available, showing how to interface a Scelbi to a Scopewriter. I thought it also might make a nice display at VCF east.
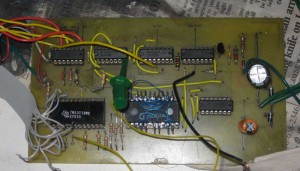
So, using the PCB layout in the magazine I etched a PCB and acquired parts. Most parts were easily obtainable. However, the TMS2501, TMS3112 and the 1N750A zener diodes were hard to find. Eventually I found a TMS3112 in the UK. I tried buying a TMS2501 on ebay, but it turned out to be out of stock. Finally, I figured out that I could substitue a GI 2513 for the TMS2501 with some rewiring. I did a cross reference of the 1N750A zener diode and decided that a 1N5230 should work in place of it.
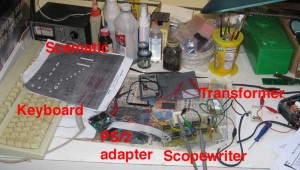
Next, I built it up and connected a PS/2 keyboard. So far, so good.
The problems started with the first debug session. I powered it up and connected the scope, hoping I would get lucky and get to see a line of characters, but nothing intelligible could be deciphered. After mucking around for a few hours, I found some mistakes in the 2513 wiring that I had hacked together to make the GI part work in this circuit. I fixed that and when the display didn’t improve and I called it a night.
Next debug session, I found that the 3 bit counter selecting the row on the 2513 didn’t look right, but couldn’t figure out the reason. I also noticed that the power supply design, wasn’t the best in the world, with a .5 volt 60 HZ wave showing on the +5 volt line. I did figure out that I had my keyboard adapter wired wrong and fixed that. At this point I could see that characters were being entered into the shift register correctly, but I still didn’t see a good display. After some hours of probing with an oscilloscope, I figured out that the GI 2513 character ROM addressing was different from the TMS2513 and that the bottom line of each character would be truncated when using the GI part. I decided that I could live with that for now. At this point, I was pretty frustrated, by continual problems, on what I originally thought, would be a simple project. I put the Scopewriter aside for a couple of months.
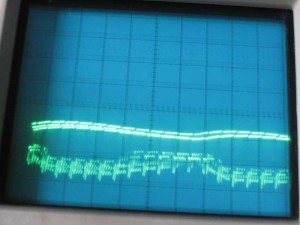
Last night I took it out again and figured out that the counter feeding row select to the 2513, worked better, if I changed a resistor in the the source clock generation circuit. Finally, if I put the same character in every position in the shift register, I could see the display of something approximating characters. Certain characters like “F” were easier to identify than others. However the display was only about 18 characters wide, unless I slowed down the scope to the point where the phosper wouldn’t persist for an entire sweep. Unfortunately, at that slow sweep speed, the display becomes unreadable.. Also the output was not stable, which I attributed to the unstable +5 volt supply.
The display of “F”s in this image actually looks a little worse than the actual display because the camera caught several scans in this single image.
Anyway, when I about wrapped things up last night, something broke in the power suppy, which is the point at which I stopped and sent my last nights blog entry and decided that this project would require several mods in order to work well.
This morning, in order to take the pictures for the blog, I found the problem with the power supply. It turned out to be the 1N5230 zerner that had failed. I have a nagging fear that this substitute zerner is the root of many of my problems, so I’ll review specs again. I replaced the zener and took the pictures of the display for this blog entry.
This has been one of the most stubborn, problem filled retro projects that I have ever worked on – hence the FAIL message. I’m going to put this project away again – maybe I’ll pick it up again some day.


