Construction Hints
Making Blasted Rock Faces
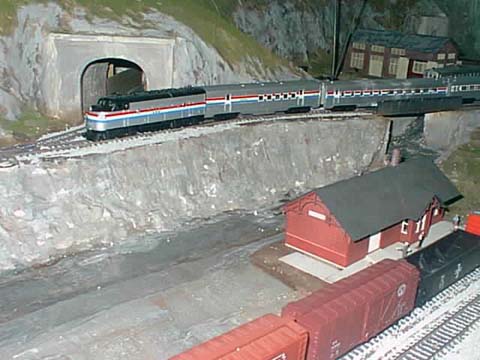
I recently redid the rock face below the Amtrak F7 in this picture. The
original face just didn't have the feel of a rock face. I tried painting
it several times and just couldn't come up with the look I wanted. Finally
I bit the bullet and got out the plaster. Since I had painted the old surface
the night before, I didn't bother to dampen it which I normally would have
done. I mixed 2 cups of plaster with 1 of water. Then I tried to plaster
over the face, but the stuff was too soupy. I then added a bit more plaster
to the mix and waited a couple of minutes for it to start to thicken. Once
it started to thicken, I used a putty knife to apply the plaster along the
rock face. When I had a good thick covering across the whole face, I used
the same putty knife to to sculpt the face so that there were few rounded
surfaces. I wasn't trying to model rock as much as trying to create a face
with lots of edges and few smooth rounded corners. I also used the edge of
the putty knife to create those rounded grooves you always see in blasted
rock faces. I would assume that these are the holes drilled to hold the blasting
charges used to clear the rock. You can't see this detail in this picture,
but if you look at real blasted rock faces, you will know what to do. I
guess one could use rock castings to make this face, but for me, it just
seemed like too much trouble.
Painting this face involves several steps. First use a light gray to
provide the base color. Paint the whole rock face with this light gray.
I use the cheap craft paints you can get at Walmart or any store that carries
craft supplies. There is no point in using fine modeling paints on scenery.
Next step is to put in highlights of brown, green, yellow and maroon. I
used craft paints for this, as well. For these highlights, I will dilute
the colors a bit in water so they don't go on too heavy. Just dab the color
on a bit here or there. Also as you switch colors, reuse the same cup that
had the previous color in it and mix some of that old color into the new color
and onto the brush. Don't worry about being perfect. If you don't like
the look you end up with, just start over again with the light gray base.
Finally, I put a wash of india ink heavily diluted in isopropyl alcohol.
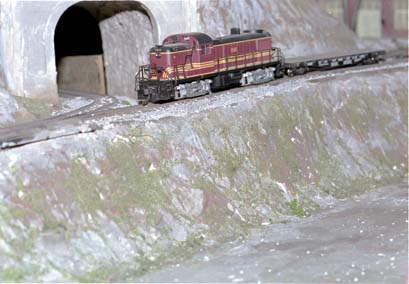
By now I've added some more paint and ground foam to this rock face and
this is now what it looks like. In addition, the layout has had a quite a
bit more wear and tear since the original photos.
Nailing track nails into plywood
We used 3/4" plywood sub roadbed and cork roadbed on our railroad. The
Atlas track nails we use don't go into the plywood very well, usually bending
instead of going in straight when driven by a tack hammer. The solution
I am currently trying is to put a track nail into a pin vise and using the
nail to drill a pilot hole. I originally tried a cordless drill/driver,
but the chuck wouldn't hold the track nail. This seems to working OK, so
far. Got the idea from my dad when he said some finish carpenters use the
same trick to drill pilot holes in trim, to avoid splitting.
Fences for tunnels
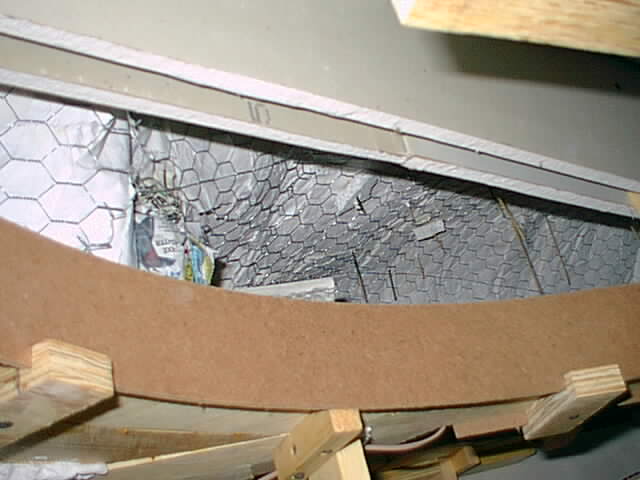
My dad and I came up with what I think is a pretty good system for making
and installing guard fences in tunnels. Simply rip a long length of wood
about an inch and a half wider than your sub roadbed (say 3 1/2" for 2" wide
sub roadbed). Then rip a 1/8" dato 3/8" deep about 1/4" or so in from each
side. This will be a groove that should tightly hold strips of 1/8" hardboard
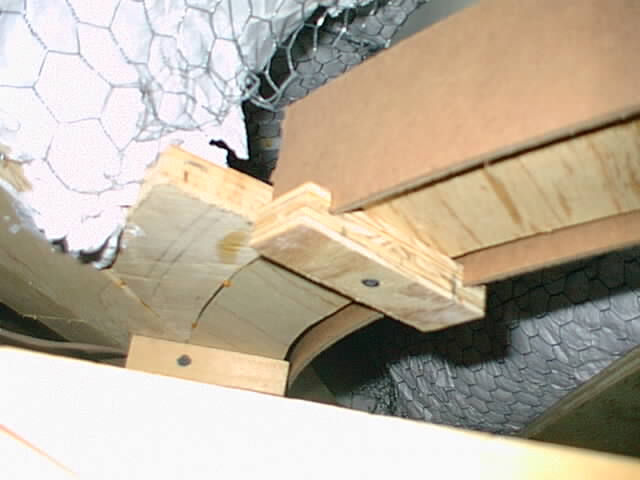
that will be the fence itself. Crosscut the wood into 2" wide pieces to
make bracket s. Screw the brackets every foot or so to the underside of your
sub roadbed with the groves for the fences facing upward. Now cut appropriate
strips of that 1/8" hardboard and they can be simply placed into the grooves
into the brackets. They can be removed at any time for access to the track.
Model fences
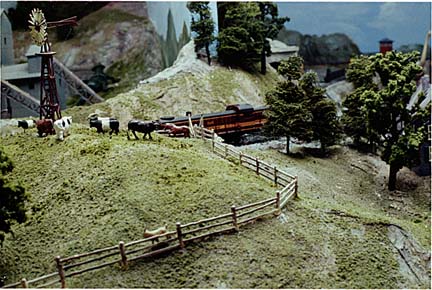
I built this fence on our layout using Atlas rustic fence as a starting
point. Since the pasture was not totally level I had to cut and splice the
pieces from several kits together to keep the posts vertical. All real fences
are built with the posts vertical. I also used those thin grocery store
spits in order to extend the posts in some places, since they are almost
the same diameter as the Atlas rustic fence posts. I didn't use the bases
provided with the rustic fence after the first few sections were in place.
I simply drilled a small pilot hole in the plaster and glued with fences
to the plaster with white glue.
Actual fences may be built with or without the rails running horizontally.
I made mine horizontal simply because it was easier to do.
Note the Lakenfelder (Dutch Belted) cattle in the picture above. We saw
them on a trip recently and thought they were very unique, so we incorporated
them into our layout.