Update 12/30/2009:
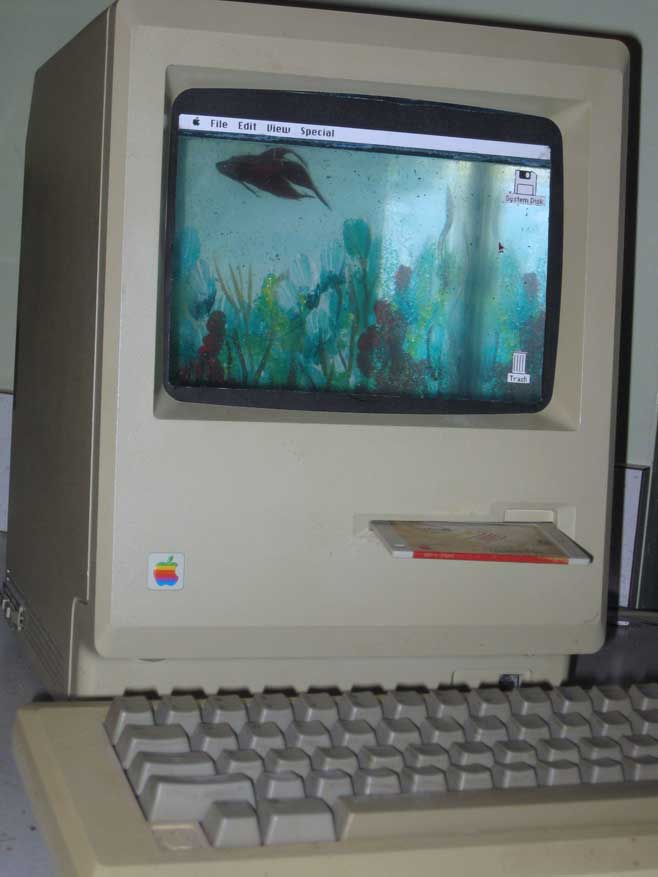
Macquarium is now operating with a male Betta Splendens
comfortabily roaming the interior. My wife has taken custody of
the Macquarium, which is why it has finally been put into comission.
The
kids and their friends really get a kick out this unit. The LED
lighting is controlled by the on/off switch at the rear of the unit and
works wonderfully. The air pump has been disconnected because it
was too loud when operating inside this echo chamber. The
background scene was painted by my wife on a piece of scrap canvas and
wrapped around the outside of the tank, before inserting into the
enclosure.
Total cost of the project was about $15 for a rope lighting set that I decided not to use and
the aquarium safe silicon glue. Everything else was either donated
or from one scrap pile or another. The glass for the tank was basically
free, since the glass place didn't have it cut when the said they would.
They gave me the glass plus some expensive non-glare picture frame
glass I had also ordered for another project for a total of $10.
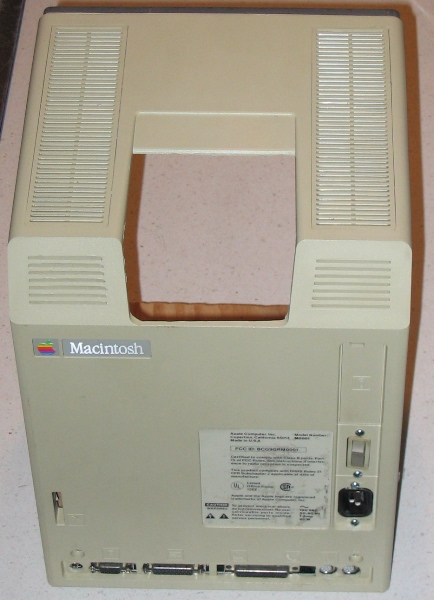
Back and top of shell showing handle cutout. Run, don't walk to
the nearest store stocking Mototools prior to starting the job of gutting
one of these machines. There is more cutting to be done than there
might first appear to be and there is not a lot of room to work inside the
case. The power connection will actually power pump and light.
Switch will control light only. It must be unplugged to remove
power from the pump. Connectors on bottom are non-functional, but allow
the mouse cable to be connected to somewhere.
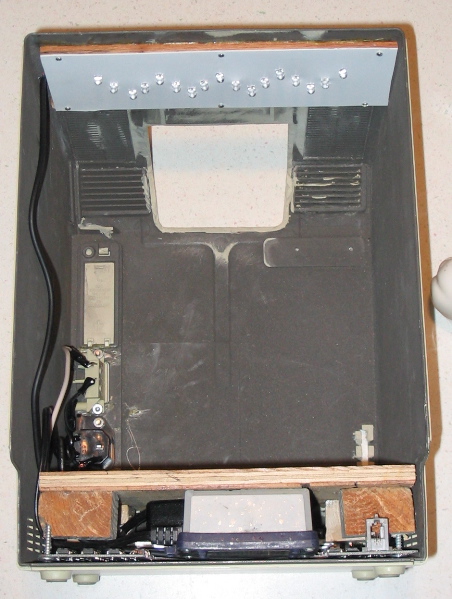
A view of inside with the front bezel and the tank removed. This
shows wiring for pump and LED lighting. Circuit board is in place
for keyboard and mouse connections. It was cut away to allow room
for pump. Power supply for lighting can just be seen hiding behind
pump. It is a converted cell phone charger. Plywood platform
for tank is supported by a screw in each corner, which allows for some adjustment.
I will add more insulation around the power connections prior to installing
water and fish. I'm a little nervous about the proximity of water and
AC power, which is probably slowing up progress more than anything else.
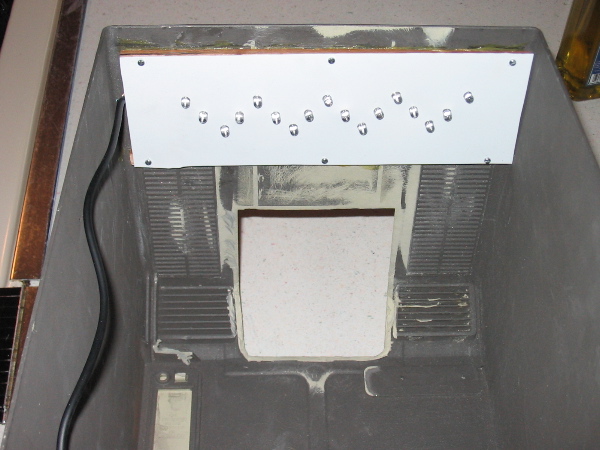
LED lighting, an idea from one of my co-workers. LEDs are small
and approximately 10 times more efficient than incandescent lighting making
them ideal candidates for this application. I'm hoping the bluish
light works well in this application. LEDs are mounted on a plastic
sheet which is screwed to a couple of strips of wood of appropriate size.
The wood was attached to the top with contact cement.
LED wiring is simple. Each led requires a current limiting resistor.
Use ohms law, the measured voltage output of the chosen power supply
along with the rated current of the LED to determine resistor value.
Painting the tank sides and back. The top and front were masked
off to keep the inside and front free from overspray. I'm hoping
the dark green shows off the fish well, though I'm already wondering if
I shouldn't have tried a dark blue, instead. This painted
exterior was abandoned. Instead an scene was painted on canvas
and wrapped around the the outside of the clean glass.