SCELBI 8H is now capable of running BASIC!

Thanks to Mark Arnold, who stripped down SCELBAL to the barest fundamental elements, I now have BASIC running on a 4K SCELBI 8H for the first time, ever. Mark, who created SCELBAL back in the mid 70’s calls his new stripped down version of BASIC, “tiny SCELBAL”. He removed all non-essential features, including support for floating point math in order to make it fit into 4K. There are only about 350 bytes for program space left in a 4K SCELBI 8H, but that is enough for some very simple games. I have ported a version of HILO from Ahl’s “BASIC COMPUTER GAMES” book, and made it fit. I’ll be making a video, posting source and object files very soon. I’ll also post the source of HILO and describe some space saving tricks.

Mark says SCELBI considered doing this back in the 70’s, but determined the result would be too limited to be useful for most practical purposes.

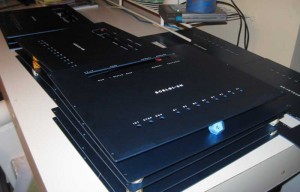
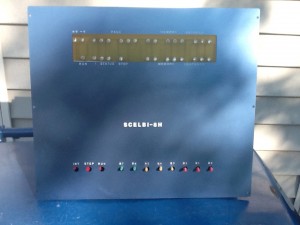
SCELBI front panels now available

I’m now taking orders for custom made reproduction SCELBI 8H front panels.

Price is $65 plus $10 shipping continental USA or $20 international. I am pricing these more as service to SCELBI PCB kit builders than for profit. When I eventually sell most of the 20 that I have made, there may be a small profit in it for me, but it will not be much. Based on my experience, unless you were already set up for making custom front panels, making a single one for yourself would cost at least two to three hundred dollars.

A couple of things to be aware of.

  • In my opinion, they look very good, but on close inspection you can tell that they are not perfect examples of what many people expect from modern machine made goods.
  • I will try to ship the best looking examples to first buyers, but even the ones with the most defects look very good.
  • The screen printed legends are rather fragile and can easily be damaged or rubbed off. I recommend you overcoat with some kind of clear satin spray. I have put 3 light coats of Minwax satin spray lacquer on my personal unit and it looks better than without the overcoat. I would do this myself for all units sold, but this sort of process takes a lot of time and care to get it right and it would make any tweaking or customization by the end user more difficult.
  • Send an email to:mike@willegal.net if you need more details on ordering.

    Progress on SCELBI Front Panels

    We are almost there.

    SCELBI Front Panels

    SCELBI Front Panels

    I need to reprint the bottom portion of a few that I printed last week. This weeks session went much better. There are a few minor defects in the printing, so I’m not guaranteeing perfection.

    The printing is pretty fragile. IPA takes it right off, with almost no effort. I’m going to experiment this weekend with spraying a light coat of clear as a protective overcoat before taking orders.

    Regards,
    Mike W.

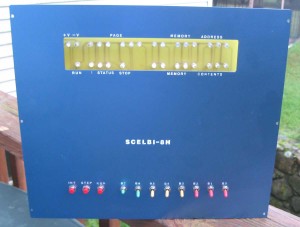
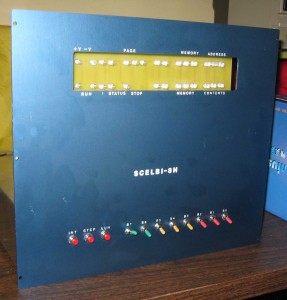
    SCELBI Front Panel Installed – new images

    I found a digicam and was able to take these photos.

    SCELBI Front Panel Natural Lighting

    SCELBI Front Panel Natural Lighting

    Front Panel - flash lighting

    Front Panel – flash lighting

    This panel has more scratches than most of them. Installed and in normal lighting it takes close inspection to reveal them. It is good enough that I’m going to use this panel on my “exhibition” SCELBI.

    Within the next week, I should be able to screen print the rest of the panels, figure out the best way to ship, and set a price.

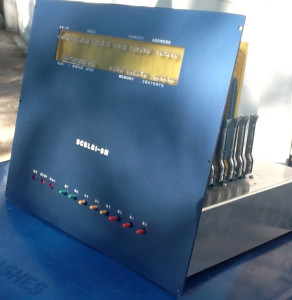
    First Front Panel Screen Printed

    Unfortunately I can’t find a decent camera, so this is a poor iPad shot. There are some small defects and a bit unevenness in the printing, but the overall appearance is good. I think I can improve the unevenness by using more “ink” during the “production” run.

    Trial Front Panel

    Trial Front Panel

    Front Panel II

    Front Panel II

    I have a jig made, so I can print the rest once I properly mount this trial unit and do a bit of checking on the how well the paint adheres to the anodized aluminum.

    Compare to some of the images at www.scelbi.com

    Kit and PCB availability Status

    Here is a summary of status of kits and PCB availability

  • Mimeo 1 PCBs – out of stock – new PCBs coming late fall 2013
  • Mimeo cassette interface kits – plenty in stock
  • Datanetics PCBs – less than 10 left – no brackets available – considering run of reproduction keycaps
  • PS/2 keyboard adapters – plenty in stock
  • Apple II rev 0 reproduction – out of stock – new PCBs coming fall 2013
  • Brain Board kits – less than 10 left – rerun plans are up in the air
  • SUPERPROTO PCBs and kits – less than 10 left – rerun questionable
  • SCELBI 8H PCB set – in stock – extra SRAM boards available, too
  • SCELBI TTY PCB – plenty in stock – still untested- caveat emptor
  • SCELBI front panels – probable Sept, 2013 – being anodized now, screen printing legend will be next
  • SCELBI 8B PCB set – layout work in progress – given the other ongoing projects, and other planned expenses, I’m realistically looking at 2014.
  • email: mike@willegal.net if you have any questions

    How Much Should 20 SCELBI Faceplates Weigh?

    THis question came to mind when determining why shipping cost from all the way across the country was only $4.95, which seemed low.

    I calculated this three different ways using the measurements of .1″ x 11″ X 12.75″ for the aluminum faceplate.

    1) Use this online calculator http://www.onlinemetals.com/calculator.cfm result was 1.4 pounds per piece for a total of 28 pounds. Actual weight should be a little less, because of the holes in the pieces.

    2) I looked up the mass of aluminum which is 2700 KG/M3. Then calculated the volume of 20 faceplates at 0.000226209 cubic meters. Multiplying the two results in 1.34 pounds per plate times 20 plates equals 27.87 pounds. Actual weight should be a little less, because of the holes in the pieces.

    3) Then I realized I should have just looked it up in the tracking information. Sure enough the weight of the package is 26.1 pounds, which is about what the calculations minus the holes showed it should be.

    I still don’t know exactly how the shipping was so low, but I’ll take it, knowing I have over 25 pounds of faceplates on the way.

    Correct SCELBI Power Connectors Added

    I just added the correct SCELBI power connector to my reproduction. Note that this was the factory setup. Back in the day, some people integrated power supplies right into the chassis, rather than using an external power supply. The plug is a 86CP4 and the socket is a 78S4. These days, they are kind of scarce. In this case, scarcity equates to price, as they are about 9 dollars each. Check inventory at alliedelec.com for 78S4 and at tedss.com for 86CP4.

    Here are some images.
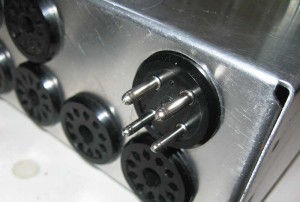
    SCELBI Power External

    SCELBI Power External

    You put the plug in the chassis so the cable coming from the power supply doesn’t have exposed pins.
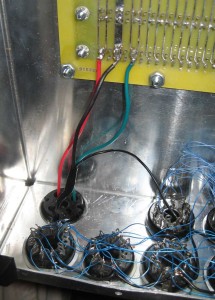
    Inside Power Wiring

    Inside Power Wiring

    The SCELBI manual says put +5 on pin 1, ground on pins 2 & 3, and -9 on pin 4. SCELI assembly directions have you position 1 and 4 at the top of the chassis. This makes wiring to the backplane pretty clean. The slip rings that are used to hold these connectors onto the panel are a pain to get on – be patient and don’t expect the rings to seat perfectly. I chose to connect the I/O port grounds directly to the incoming ground wire, rather than wire back to the backplane. Now I’m thinking I should have run both ground wires to the backplane, rather than join them together and run 1 wire to the backplane. I used 18 gauge wire, so it probably doesn’t matter.
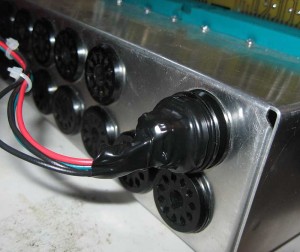
    Plugged In

    Plugged In

    The socket and plugs are keyed, in that two of the pins (positions 1 and 4) are larger than the other two. However, I think if you weren’t paying attention, you could plug this in far enough to make contact and cause problems. Be careful when plugging this unit in.

    I have used electrical tape to protect the exposed terminals on the cable coming from the power supply. I need to pick up some of the hoods that are designed to cover these connectors. SCLEBI used gray clad multi-conductor cabling back in the day. I think it is still available, but like many SCELBI components, it is pretty expensive.

    This process took me a couple of hours. Take your time to get things right and avoid costly mistakes.

    Next up – getting the TTY interface built up and checked out. Other than schematics, and parts placement, we don’t have documentation for that board, so it might take a while.