Scopewriter Working With SCELBI

SCELBI ScopeWriter Setup

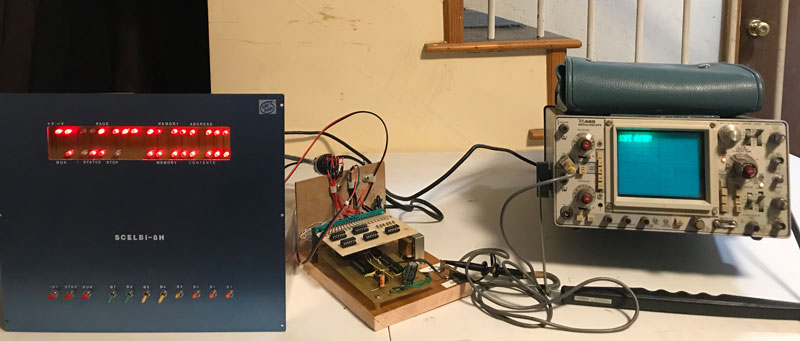
I had a few issues getting this set up working, but it had more to do with the fact that I hadn’t powered up my SCELBI 8H in a long time and I had forgotten how to set it up with MCMON and the serial port adapter. Once I had that all figured out, I just had to move the Scopewriter output ports from 4-7 to 0-3 and tweak the driver to reflect the changed port assignments. After that, the Scopewriter interface worked without any further problems. Well, to be honest, I did initially put a couple of the 74XX chips into the wrong sockets, but that was easily diagnosed and rectified.
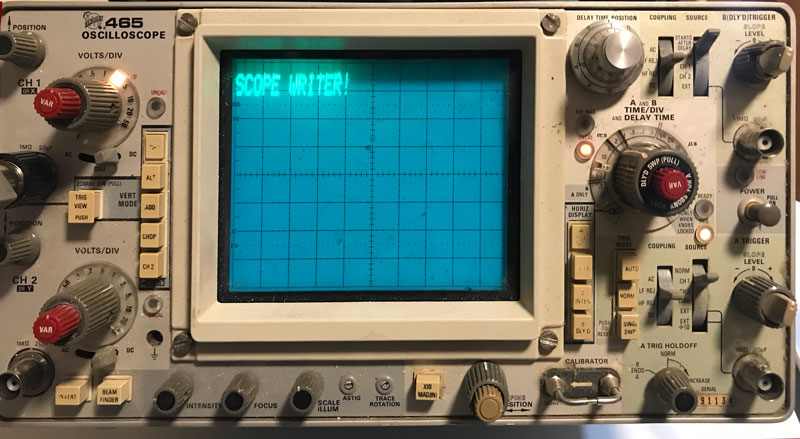
SCELBI Scopewriter Output

The SCELBI-Scopewriter project has one more step. I’m going to create a modified version of MCMON that uses the Scopewriter for output and the SCELBI keyboard interface for input. This is a combination of historically available add ons. They will transform the SCELBI 8H from a very difficult to use computer to a machine that is fairly practical. If you added a cassette interface, the system ends up with pretty decent capabilities for the day. It’s true that the cassette driver would have to entered via the monitor program, but that shouldn’t take but a minute or two.

The neat thing about this, is that all this technology existed in one form or another, back in the mid 1970s. It’s true that I basically rewrote the Creed monitor for the SCELBI, but the rewrite was certainly something that was doable back in the day.

A little more about the SCELBI Scopewriter Interface

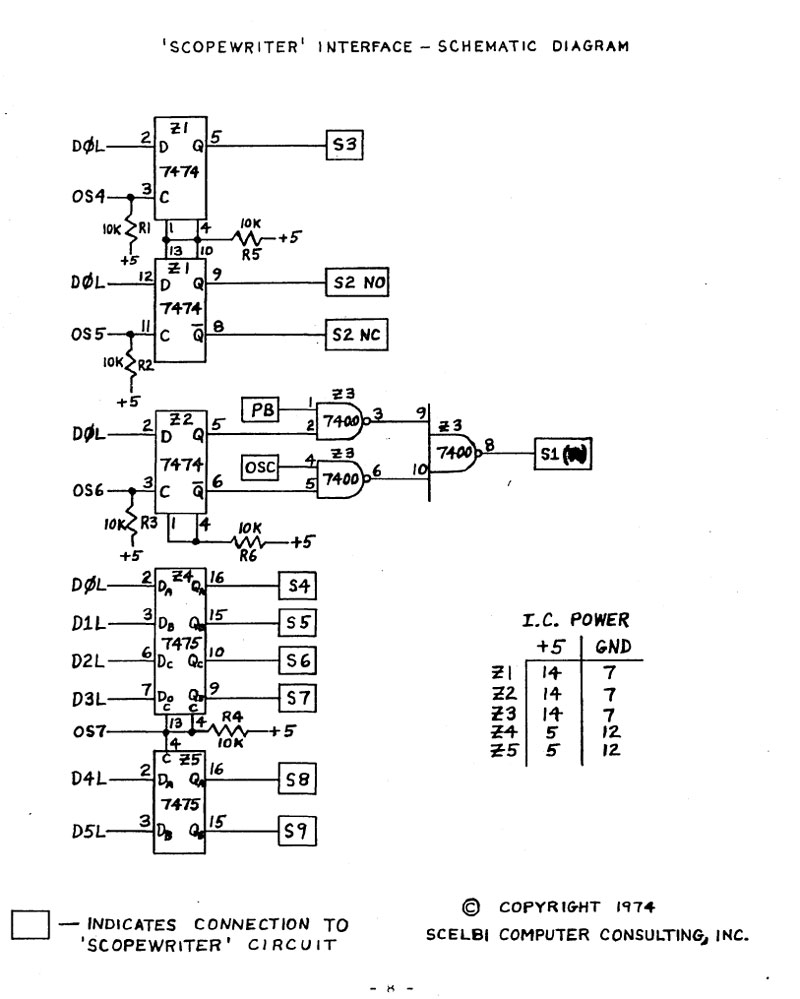
This interface is pretty simple. It uses the strobes and data bit 0 from three output ports to control the Scopewriter switches S1 through S3. It uses another strobe to load the character from the data bus into a 6 bit latch.

Scelbi Interface Schematic

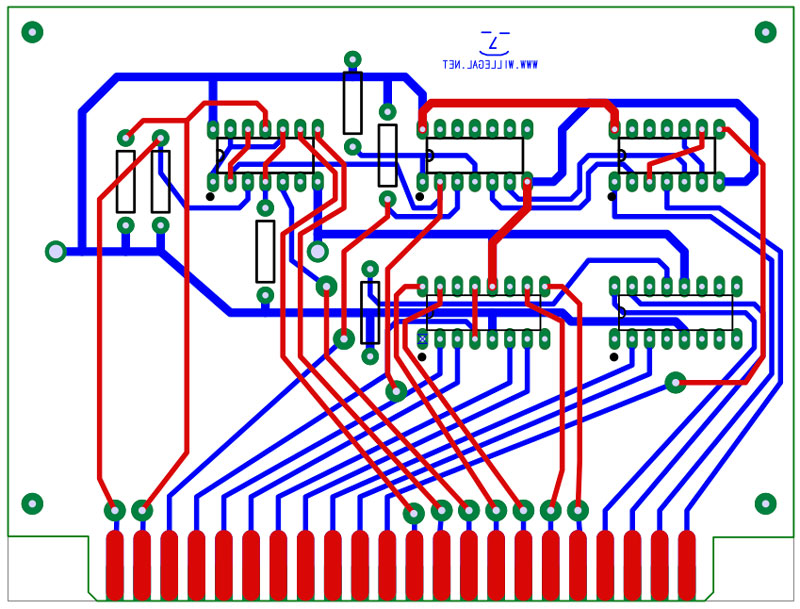
I thought about how best to implement this design. I even went through the effort to create a PCB design.

SCELBI Interface PCB

In the process of creating this PCB layout, I think I found one mistake in the schematics. OS7 should be connected to pin 13 on Z5 instead of pin 4. I’ll verify this when I power up and check it out.

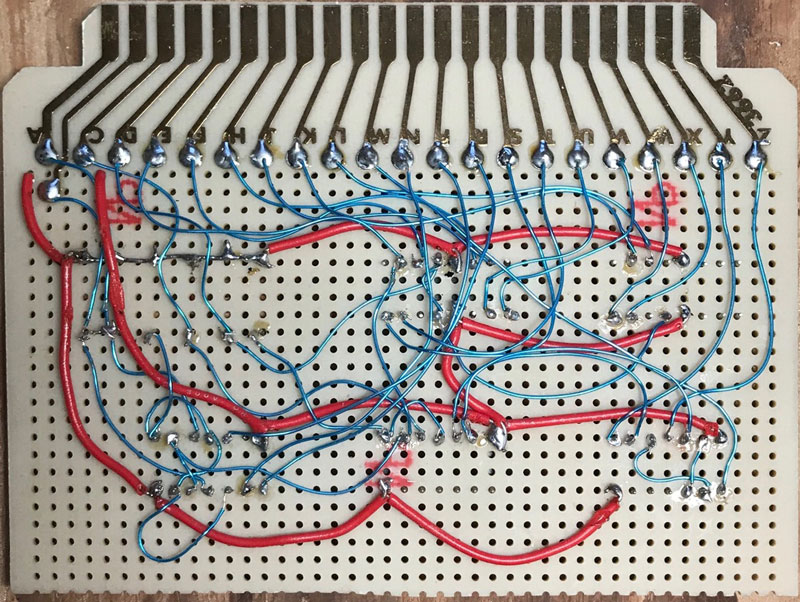
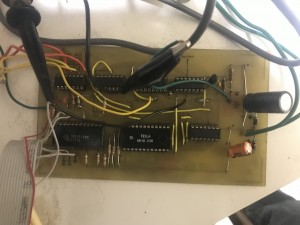
When I remembered that I had a perf board with a 44 pin edge connector, I decided to build the Scopewriter interface with that. I could have etched the PCB that I laid out. This design requires a two sided PCB and etching those at home is quite a fiddly process. This perf board probably would have been slightly quicker to wire using wirewrap techniques, but I didn’t have a sufficient quantity of wirewrap sockets. I was able to complete the wiring on the perf board in about a half a day. That is about the same amount of time that it would take to cut, etch and drill a custom PCB. The result is shown below.

SCELBI scopewriter interface

The interface uses 22 signal lines, which doesn’t leave room for power and ground on the same side of the edge connector. I decided to add +5 volts and ground to pins 1 and 3, on the top side. Those are the red wires in the photo.

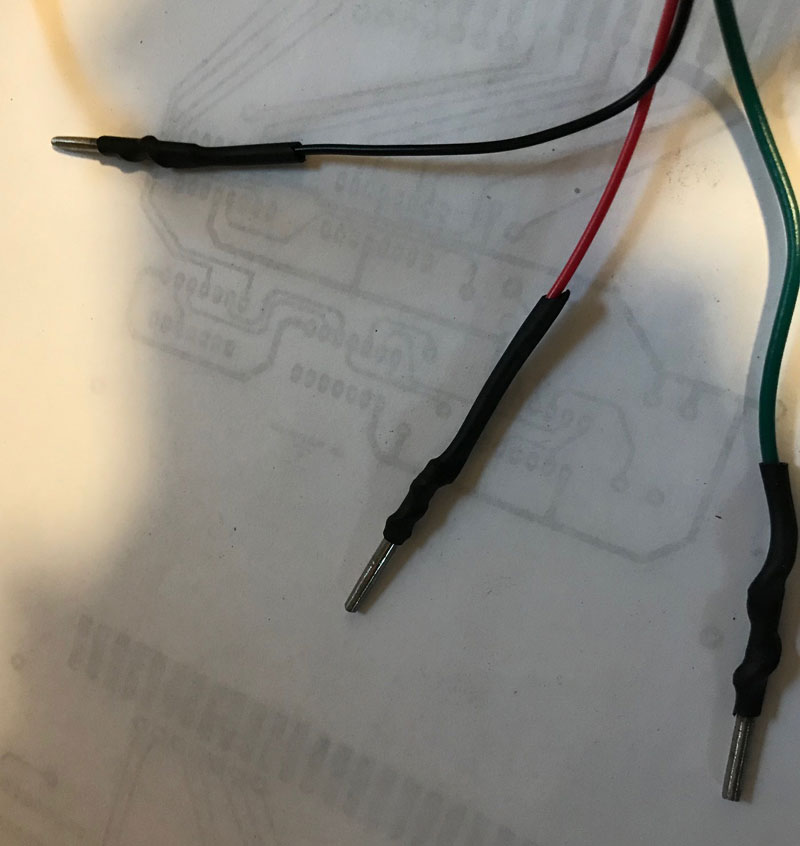
Since I’m short on Amphenol sockets, I decided to connect three of the four strobes from the SCELBI chassis, without a full connector. I cut down and filed a finish nail so that it would fit snuggly into an Amphenol socket. Then I soldered it to the end of each wire.

SCELBI Strobe Connectors

It occurred to me that this interface could probably be redesigned to use two output ports instead of four. This can be done by latching data bits 1 and 2 with OS4, instead of using separate strobes to control S1 and S2. I decided to stay with the original design, so I could use the original software.

The build decisions were partly driven by what I had in my spare parts stash, which once again proved diverse enough to support this project without requiring any new purchases. That is a good thing.

SCELBI Scopewriter Interface

SCELBI Scopewriter Interface

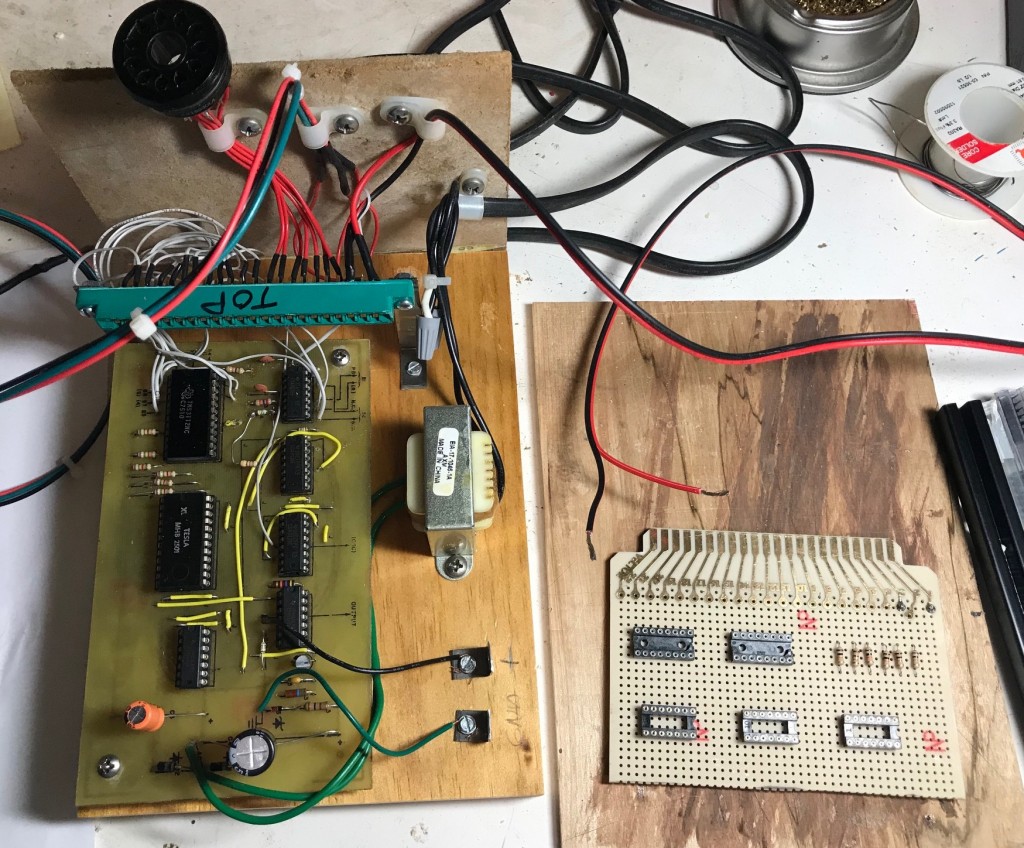
This interface design is taken directly from the SCELBI Computer Digest, volume I, issue I. With the exception of the enclosure, it turns out that I had all the parts needed in my stash to build it. The dimension of the block of wood that I’m mounting this on, are set up such that it will be easy to move it into a Bud 3009-A enclosure. This is the enclosure in which most SCELBI peripherals are housed in.

It’s about ready to power up, but I’m wondering how much effort it will take to make it work. Unlike many people doing similar projects, I’m not real anxious to find out. More often that not, I’ve spent many hours trouble-shooting these kinds of designs before they could be made to work. Let’s just say that, at this point, I’m a little gun shy. I’ll most likely power it on tomorrow morning.

Scopewriter Update

I’m preparing to try interfacing my Scopewriter to a SCELBI computer.  One issue I had with the Scopewriter was the character generator.  It was designed to use a TMS2501, which I have been unable to find a source for.  A while back, I adapted a GI 2513 for the purpose, but it was kind of a hack.  A while back, a friend in Europe sent me a substitute, a TESLA MHB 2501, which he says are readily available for low prices over there.

Tesla MHB2501 in scopewriter

Tesla MHB2501 in scopewriter

This substitute works fine. Stay tuned for an future blog article describing how this interfacing project goes.

More on SCELBI

In September, I did a presentation on the history and technology of the SCELBI computer business at VCF-Midwest.  I enjoyed doing the research for that talk, and it inspired me to start writing down what I learned.  This story will be illustrated with many of the images that I have acquired over the years of researching SCELBI.

I’m about 2/3rds of the way through writing the initial draft.  As I put together this document, I am learning a lot more than I expected.  I have answered a few of the questions I had originally raised, in preparing the VCF-MW presentation.  Some other questions have been raised, but I suppose that that is how these things go.

As I started writing this story, I found it was necessary to put the SCELBI business in context with other start up businesses and hobby activities that were going on at the time.  This story is becoming almost as much, the story of the first generation of 8008 based home/hobby computers, as the story of SCELBI, itself.  I plan to have a draft to share in a month or two.

My hope that the vintage computer hobbyist or historian might enjoy this story, once I get it into shape.

Operating an Original SCELBI 8B

I recently spent a few hours with Mark Arnold and his original SCELBI 8B. This is the very machine that Mark used to develop SCELBAL with, way back, in 1975. Towards the end of our debug session, we had the machine in a largely working order!

Mark Arnold with his SCELBI-8B

Mark Arnold with his SCELBI-8B

We spent a lot of time, troubleshooting what appeared to be an intermittent EPROM issue. Finally we discovered that that the edge connector on the EPROM board wasn’t making reliable contact with the connector. After examining the board in detail, we noticed tarnish on the edge connector contacts. We used a soft pencil eraser to clean the tarnish off of the contacts and the intermittent operation completely disappeared. Fixing a computer with a pencil eraser was a first for me, though I expect others have done the same. Once the repair was done, Mark was able to reliably run a variety of MEA operations without any problems.

With only 4K of SRAM installed, we were unable to load the full floating point SCELBAL, but we were able to load tiny SCELBAL using a simple bit-banged RS232 port. Once loaded, Mark successfully entered and ran some small BASIC programs. Weeks later, I understand that Mark still has the system powered on and it responds to MEA commands, without any need to reset or reboot.

In order to declare that the machine is in 100% working order, a few things still need to be checked out. We had only 4K of SRAM installed, the other 8K should be added back into the system. We used a modified version of MEA with the page 76 EPROM changed. I created a version of page 76 EPROM with a 2400 baud driver, but we were having some issue with corrupted serial output characters. We don’t know if that was a ground loop problem or a baud rate problem with the modified page 76 driver. Serial input at 2400 is working perfectly, but the timing for output is done differently, so it could be either.

Finally, the cassette interface needs to be connected and tried out. I don’t really expect any issues with that, as I have used that particular cassette interface with a reproduction SCELBI 8B, back when I was first troubleshooting my reproduction cassette interface.

Reproduction SCELBI 8B demonstrated at the Museum Of Computing History (UK)

I just received this report from David Williams in the UK.

Hi Mike,

Just thought I’d drop you an email to let you know, I took my SCELBI 8B to the Retro Computer Festival at the Museum Of Computing History last weekend. Only a handful of people recognised the system initially but hopefully a few more people are now aware of the history behind the machine.

I spent a good while describing the system to one chap who I later discovered is the guy heading up the EDSAC replica build at Bletchly Park.

I was able to demonstrate the basics of the system using the monitor program to edit & display memory along with entering short programs. I couldn’t get SCELBAL to load due to a RAM fault (Only Identified when I got back home) which was a shame.

I’ve attached a photo of the setup. Terminal being used is a TI Silent 745. The box below the SCELBI is the power supply, Teletype interface to the right and a fast-load box as described in issue 1 & 2 of the SCELBI newsletters.

Cheers,
Dave

David William's 8B (reproduction)

David William’s 8B (reproduction)

SCELBI 8H Usability Reasessment

For a long time, I would say that the SCELBI 8H was the first practical computer marketed to the general public. The key word being practical, as certainly many of the other personal computers of the day, were not very useful machines, other than for educational purposes, at least without adding additional capabilities to them.

From the time that I got my reproduction SCELBI 8H working, I’ve been able to demonstrate a number of interesting, practical applications on it. That I was able to do so, was justification for the claim that a SCELBI 8H was a “practical” computer. However, I’ve always used a second computer to assemble the source code and then downloaded the application to the SCELBI through a serial port. A few months ago, when I talked to Bob Findley, I asked about how they did application development for the SCELBI 8H. It turns out that Bob and Nat used almost exactly the same approach that I used. Only thing is that they used a PDP-8 as a platform for the cross assembler and a teletype with it’s paper tape punch/reader to download the program to the SCELBI. Though the cross development platforms are different, what Bob and Nat did, was essentially the same as what I’ve done.

I’ve come to realize that though you can run some interesting, practical applications on the SCELBI 8H, it really can’t do it, without either help from a host computer, an impractical amount of time, or the addition of features like a built in monitor. After talking to Bob, and thinking about it a bit, I guess I’m ready to say that though the SCELBI 8H, as shipped, can run practical applications, it was not a very practical stand alone computer. However, that still doesn’t remove the significance of the SCELBI 8H as the first offering from one of the very first personal computer startup type companies.

Note that the limited capabilities of the 8H were recognized by Nat and Bob, who developed the follow on SCELBI 8B, with it’s extensive built in software suite. More about the 8B in a follow on post.

How Many SCELBI’s Were Really Sold?

According to Bob Findley, whom I spoke to earlier this year, the often quoted number of 200, is an exageration. Bob said they sold more than 40 completed systems and over 100 board sets.

One interesting thing that Bob said, is that until the Altair came to market, they felt that they had the market to themselves. The Mark-8 wasn’t considered a competitor, as it wasn’t sold as a functional system.

I also found out why there are so few Oscilloscope interfaces remaining (only one is known to exist at the CHM). Bob said that they only sold about 4 of them.

More information from Bob in a follow up post.