Keyboard Gizmos

parallel keyboard gizmos

parallel keyboard gizmos

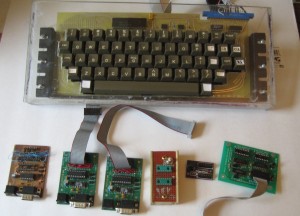
Here is a popouri of parallel keyboard projects that I have been involved with designing.

Not shown

  • A simple single chip AVR PS/2 to parallel keyboard adapter that I forgot about when I assembled the items for this picture.
  • At top is:

  • A reproduction Datanetics keyboard
  • At bottom, from left to right…

  • Home etched/prototype PS/2 to parallel keyboard adapter
  • Production PS/2 parallel keyboard adapter configured for Apple 1/Mimeo
  • Production PS/2 parallel keyboard adapter configured for Apple ][. The latest version firmware can also be used with other vintage computers
  • Home made Apple ][ keyboard to Apple 1/Mimeo motherboard dongle with clear switch – based on schematic at Wendel Sander’s Apple 1 site
  • Production Vintage Micros Apple ][ keyboard to Apple 1/Mimeo motherboard dongle with clear switch. Similar to home made one
  • Corey Cohen’s parallel keyboard multiplexor. Automatically accepts and switches input from two different parallel keyboards to a single destination motherboard.
  • Not shown are a number of projects that I have started, but not completed (yet)

  • Datanetics replacement using modern components
  • MM5740 replacement using modern micro controller
  • And then there are the projects that never got past investigation stage.

  • ADB bus to parallel adapter
  • PS/2 Apple IIe keyboard adapter
  • It’s really hard to imagine that I have spent so much time mucking with simple parallel ASCII keyboard technology.

    Reproduction SWYFT CARDs Arrived

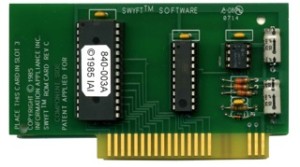
    I just got my reproduction SWYFT CARDs in and they look and work great.

    Reproduction SWYFT CARD

    Reproduction SWYFT CARD

    I’ll be releasing them at VCF east in a few weeks. I’ll also be doing a soldering workshop in which you will be able to build one, even if you are a novice at soldering.

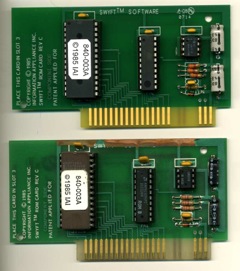
    Reproduction and Original SWYFT CARDs

    Reproduction and Original SWYFT CARDs

    The SWYFT CARD was used as a prototype/proof of principal implementation by Jeff Raskin’s company, after he left Apple after the falling out with Steve Jobs. Later they came out with the SWYFT Computer and the Canon Cat.

    Check out the VCF website for details on VCF east 9.1
    http://www.vintage.org

    regards,
    Mike W.

    Kit and PCB status update and a question

  • Coming for VCF east – SWYFT card reproduction kits – special introductory price if you join my SWYFT Card soldering Workshop – $40, drop me an email to register. Part of the proceeds goes to help support MARCH. After VCF east, price goes to $50.
  • Mimeo’s – out of stock – expect to have new batch around end of February
  • Datanetics PCBs – 1 left – rerun timing TBD
  • Brain Boards – 9 left – Note that I’m going to try move the remaining Brain Board kits over the next few months. I might even list them on ebay, to clear them out. If you want one, time to get it, is now. A rerun is not likely to be in the “cards”. I have a vague idea for an enhanced firmware board that may or may not get traction someday in the future.
  • SUPERPROTO kits – 8 left – rerun TBD – these are slow sellers and I haven’t actually made any money on these. However, I find them useful for my own purposes, so I might do another run (someday).
  • ACI kits – plentiful (currently I’m running low on PROMs, but expect I’ll be able to find another batch without too much trouble)
  • PS/2 keyboard adapter kits – plentiful
  • A2 rev 0 – ample supply
  • SCELBI 8H – I have less than 10 8H board sets remaining. I’ll make extra SRAM PCBs, when needed. Front Panels are in limited supply (less than 15, I think). TTY boards are plentiful
  • Now for the question – should I call my Apple II rev 0 reproductions Mimeo IIs, even though they came first?

    Apple II Hedlock Fastener Repair

    The “Hedlock” connector on an Apple II is the fastener that holds the lid of the case to the case. It is similar to a 3M Dual Lock reclosable fastener. On the Apple II, it is attached to the enclosure and lid with double sided tape. Over time, the adhesive loses it’s effectiveness and the Hedlock connector comes loose from either the lid or the base of the computer’s enclosure.

    Here is an example where the tape stayed with lid, but the fastener came loose.
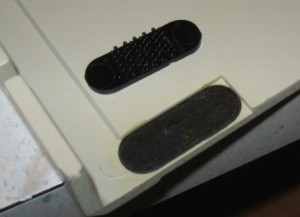
    Delaminated Hedlock Fastener

    Delaminated Hedlock Fastener

    I used to use contact cement to reattach the fastener to the tape, but I found over time that the contact cement is less than an ideal solution. I think I found a better solution using the tape found in auto part stores that is intended to reattach loose trim pieces. This 1/2″ wide double sided tape has an extremely strong, long lasting adhesive on both sides, so I expect this solution to be an improvement over the contact cement approach.
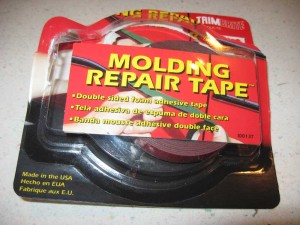
    hedlock-newtape

    Before attaching this new tape, you should remove the old tape and adhesive. This is, by far, the most difficult part of this job.

    In this example the old tape, which was attached to the lid, simply pealed off.
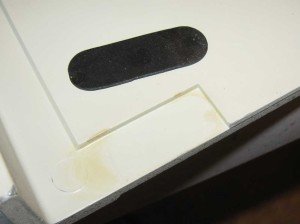
    Old Tape Removed From Top

    Old Tape Removed From Top

    The adhesive remaining on the Hedlock fastener was another matter. The bond is very strong, and in this case I eventually resorted to using a X-acto knife with a chisel blade to remove it. I left a few nicks in the surface, but since this is covered up with the new tape, I figured it wasn’t the end of the world. In a previous case, I managed to do it by rubbing with my thumb, but I ended up with a large blister on my thumb. I was temped to try a solvent like Goo Gone, but didn’t want to risk damaging the fastener. Here is the back of the fastener with the adhesive removed.
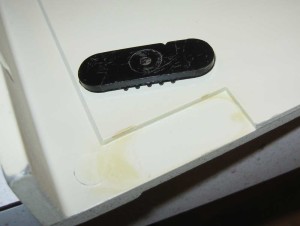
    Old Glue Removed From Hedlock Fastener

    Old Glue Removed From Hedlock Fastener

    Before reattaching the fastener, I cleaned up this area of the lid with Isopropyl Alcohol.

    Next I pealed back a strip of the new tape and stuck it to the fastener and cut the tape off from the roll.
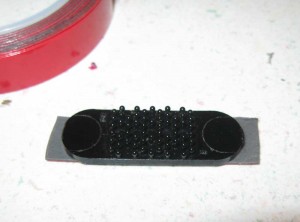
    New Tape Applied to Hedlock Fastener

    New Tape Applied to Hedlock Fastener

    Then I took a sharp scissors and trimmed the ends of the tape to match the curve of the ends of the fastener.
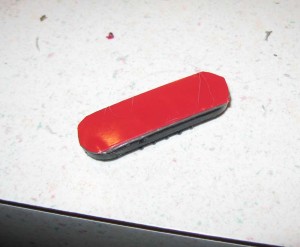
    New Tape Applied to Fastener and Trimmed

    New Tape Applied to Fastener and Trimmed

    The last steps are to remove protective backing from the adhesive tape and carefully press the fastener back in place.
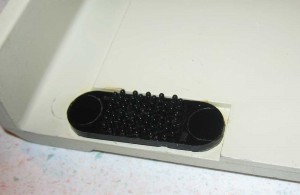
    Hedlock Replaced

    Hedlock Replaced

    I don’t know if it makes a difference, but I would wait a day before putting any stress on the reattached fastener.

    Reproduction Apple II rev 0 update

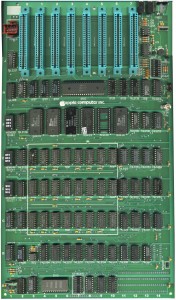
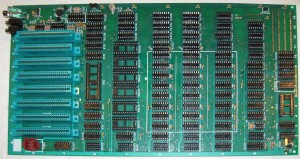
    Here is an image of my completed prototype.

    2014 edition A2 rev 0

    2014 edition A2 rev 0

    The image can also be found on my website.
    http://www.willegal.net/appleii/images/2014rev0.jpg

    This has taken much longer than expected, but I’ve got a few good decal sets ready and will start taking money, with shipments beginning no later than 1/27, with the first units likely to ship on 1/20.

    The build manual can be found here.

    Parts list can be found here.

    Cost of bare PCB is $150 plus $20 shipping. In order to make a functional board, you will need to provide components, keyboard (my PS/2 keyboard adapter works with Apple IIs), power supply (from Apple II plus), and ROMS (see my ROM page). I’ve heard from Rob at Unicorn and he might be putting together component kits (no ROMs).

    If you are not into building kits, but you are a Apple II fan, keep in mind that a framed bare PCB would look great in your den.

    Send an email to:mike@willegal.net if you need more details about ordering.

    Interesting Apple Design Video on utube and Macintosh 30th aniversary event

    One of the mailing lists that I am on, had a thread that included a link to this old video featuring talks by key members of the Apple Industrial Design team

    http://www.youtube.com/watch?v=–7Br07QKMk

    Something caught my ear while listening to the talk. It was Jerry Manocks view of how an early design decision indirectly caused the well known reliability issues with the Apple III. This is toward the end of Jerry’s talk – about 30 minutes into the session.

    Daniel Kottke has a very interesting talk about the early days of Apple, including a detailed discussion of the reliability problem with the Apple III. I sent Daniel a link to this video, because Jerry’s view provides a cause and effect scenario that isn’t part of Daniel’s talk.

    In return, Daniel mentioned that he was busy preparing for a Macintosh 30th aniversary event, something that I hadn’t heard of before. Looks interesting, so if you are in the area, you might want to check it out.

    http://www.mac30th.com